第一章
Table of contents 第一章目录
🚀 Understanding Astro 了解Astro
By Ohans Emmanuel 作者:Ohans Emmanuel
Chapter 1: Build your first Astro Application
第1章:构建第一个Astro应用程序
Long is the road to learning by precepts, but short and successful by examples - Seneca the Younger.
从戒律中学习的道路是漫长的,但从榜样中学习的道路是短暂的。
Get started with the basics of Astro by building a practical application: a personal site.
通过构建一个实际应用程序开始了解Astro的基础知识:个人网站
What you’ll learn 您将学到的内容
- Build a personal website with Astro.
使用Astro创建个人网站。 - Set up a local development environment for Astro.
为Astro设置本地开发环境。 - Familiarity with Astro components, layouts and pages.
熟悉Astro组件、布局和页面。 - A working knowledge of styles and scripts in Astro.
在Astro中的样式和脚本的工作知识。 - Theming Astro sites via CSS variables.
通过CSS变量为Astro站点创建主题。 - Leveraging markdown pages for ease.
利用markdown页面轻松。 - Deployment of a static Astro application.
静态Astro应用程序的部署。
Project Overview 项目概况
I remember my first commercial web development project. In retrospect, it was a disaster. One built by a passionate self-taught engineer, but a disaster still.
我记得我的第一个商业网站开发项目。回想起来,那是一场灾难。一个由一个充满激情的自学成才的工程师建造的,但仍然是一场灾难。
Let’s make your first Astro project one we’ll remember for good.
让我们把你的第一个天文项目变成一个我们永远记住的项目。
Getting started 开始使用
Astro is a web framework designed for speed. Before we get to the good stuff, let’s ensure we’re both on the same page.
Astro是一个专为速度而设计的Web框架。在我们开始之前,让我们确保我们都在同一页上。
Install Node.js 安装Node.js
Firstly, make sure you have nodejs installed.
首先,确保你已经安装了nodejs。
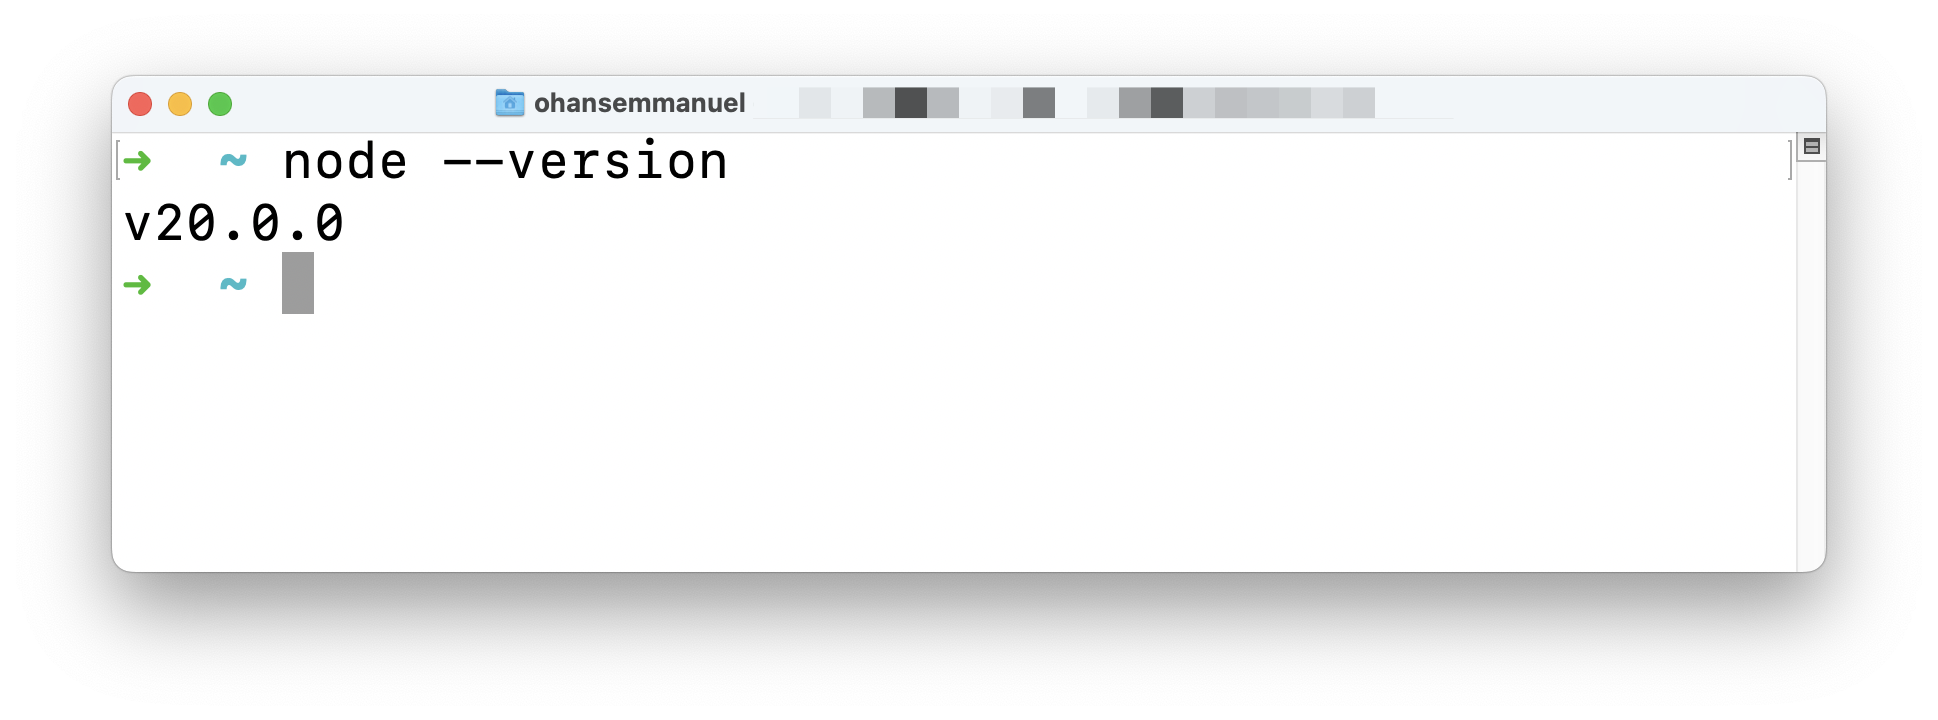
If unsure, run node --version in your terminal. You will get back a node version if you have nodejs installed.
如果不确定,请在终端中运行 node --version 。如果你安装了nodejs,你会得到一个节点版本。
Get NodeJS version from the CLI.
从CLI获取NodeJS版本。
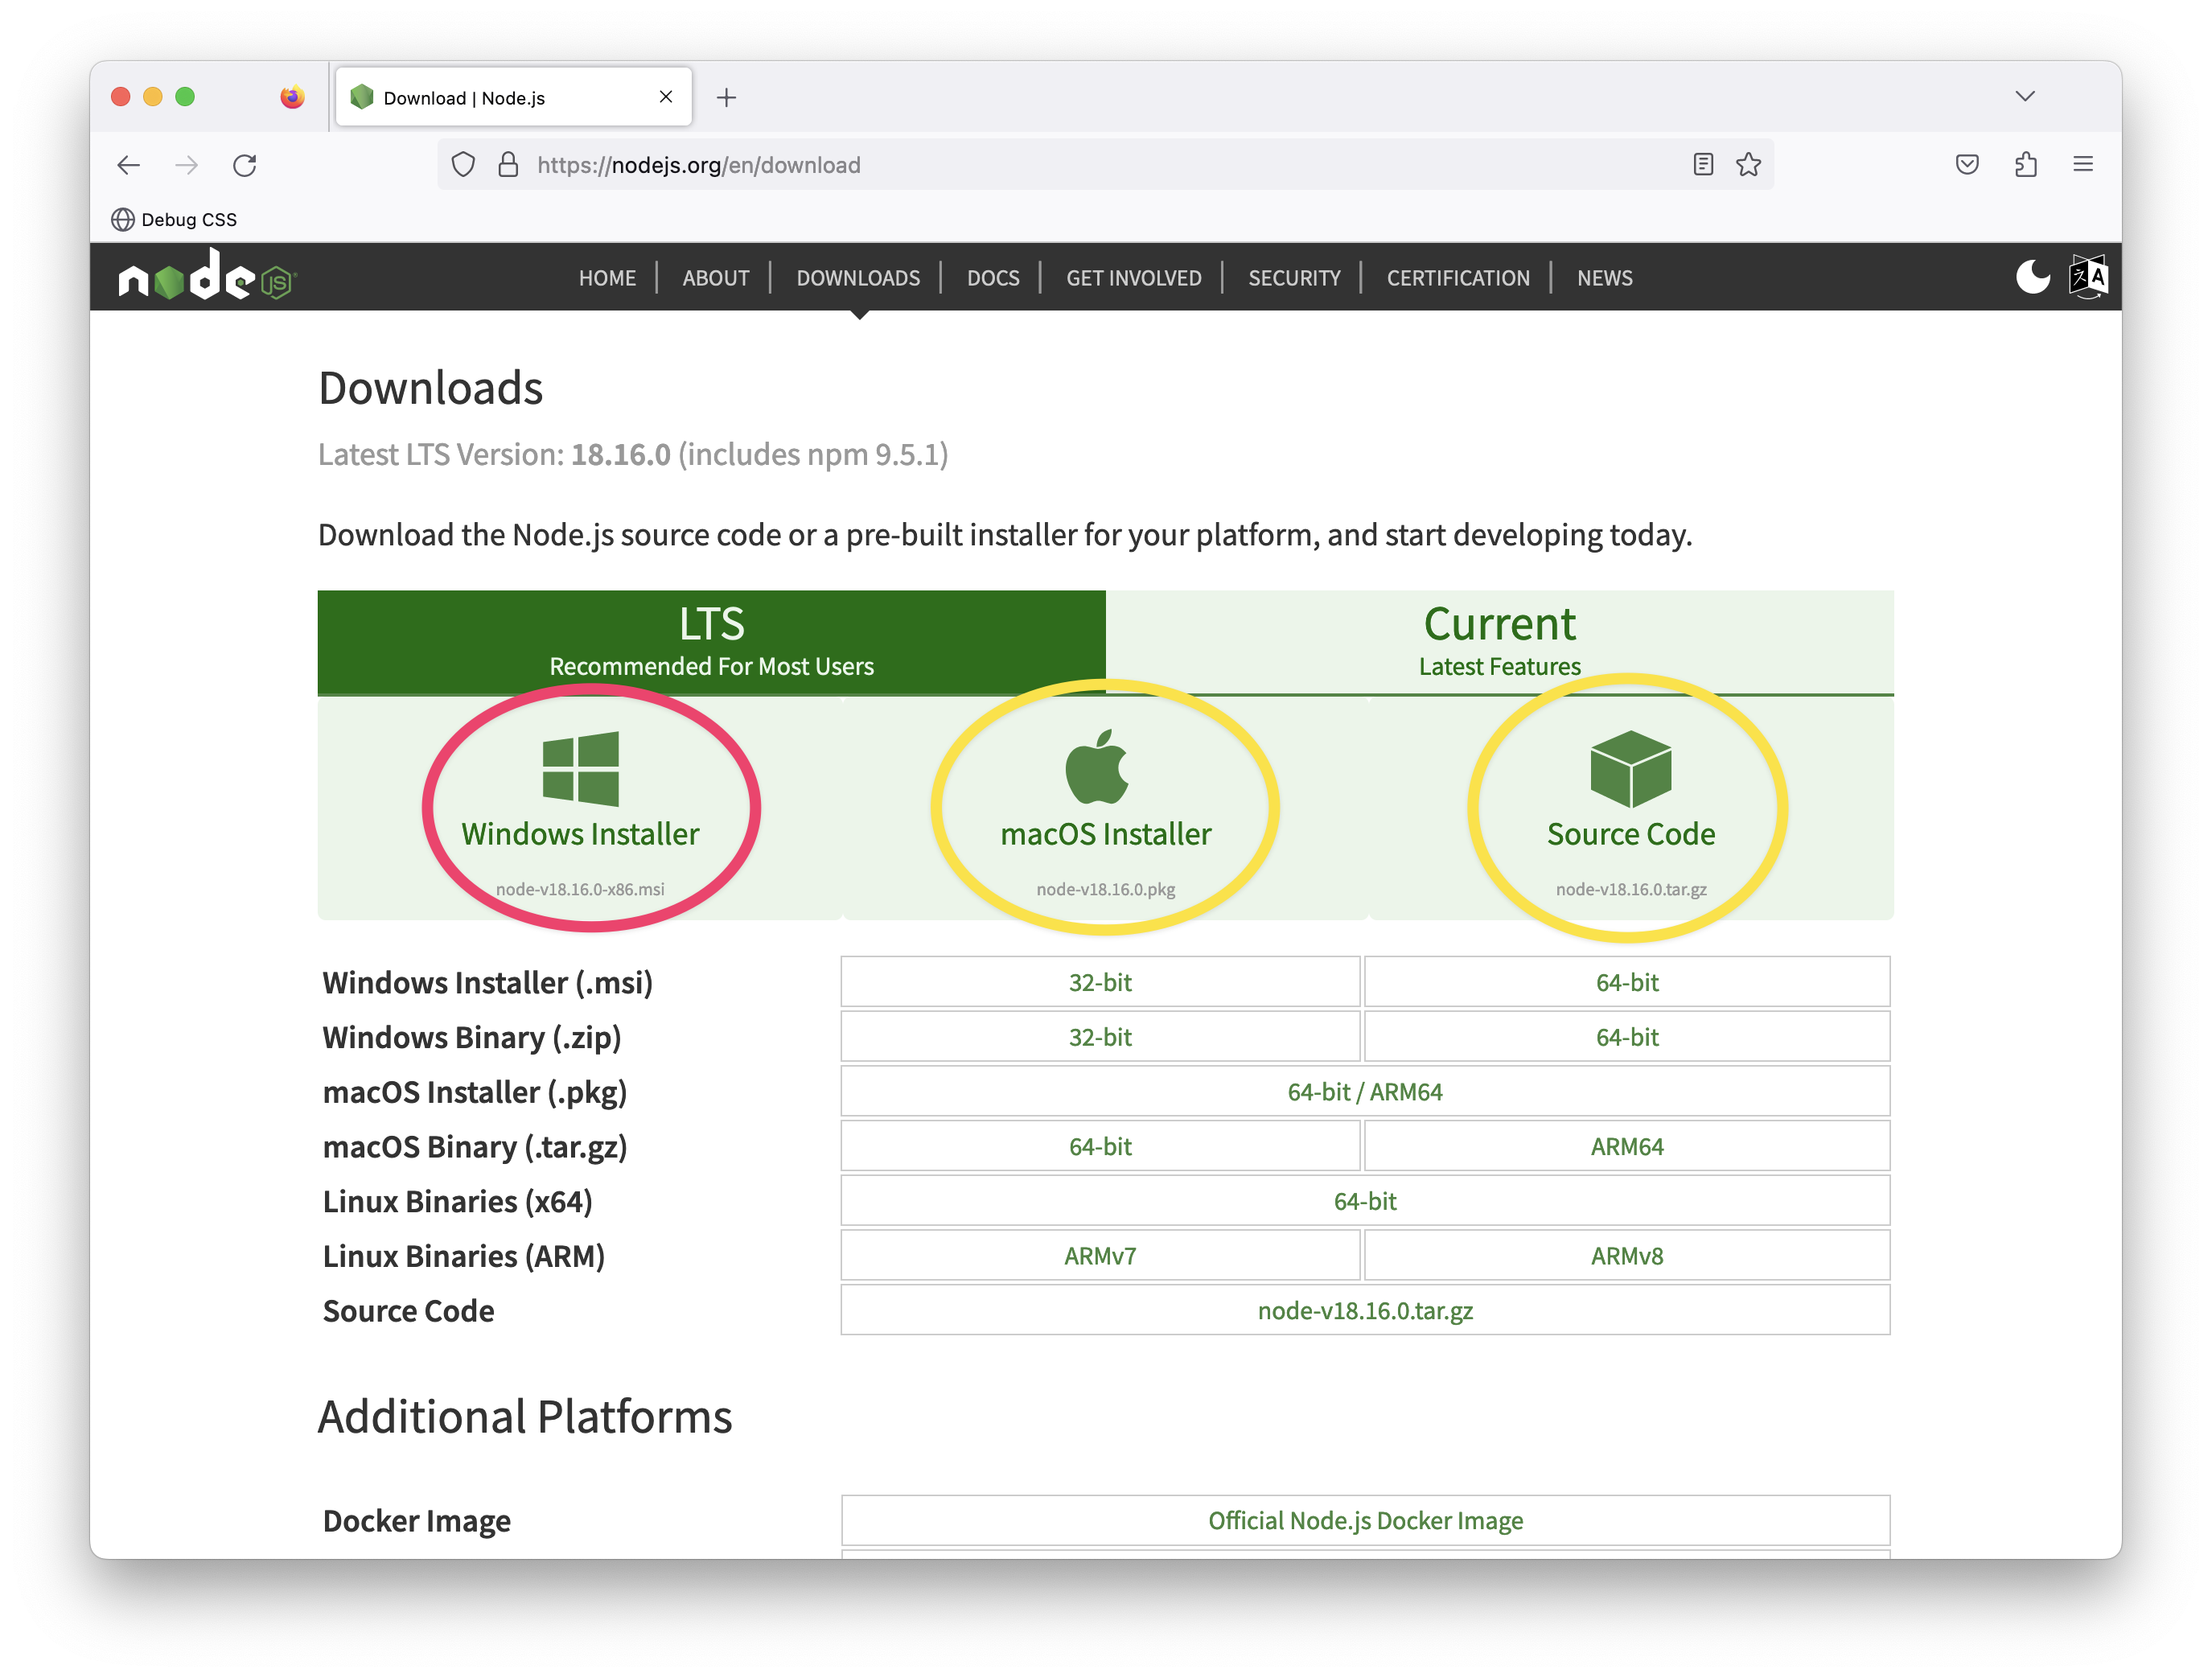
Don’t have nodejs installed? Then, visit the official download page and install the necessary package for your operating system. It’s as easy as installing any other computer program. Click, click, click!
没有安装nodejs?然后,访问官方下载页面并为您的操作系统安装必要的软件包。它就像安装任何其他计算机程序一样简单。咔嗒咔嗒!
The NodeJS download page.
NodeJS下载页面
Setting up your code editor
设置代码编辑器
I’ll avoid any heated debate(s) on what code editor you should be writing software with. The truth is I do not care. Quite frankly.
我将避免任何关于您应该使用什么代码编辑器来编写软件的激烈争论。事实是我不在乎。坦白说
However, I use Visual Studio Code (VSCode).
Visual Studio Code(VSCode)
You can develop Astro applications with any code editor, but VSCode is also the officially recommended editor for Astro.
您可以使用任何代码编辑器开发Astro应用程序,但VSCode也是官方推荐的Astro编辑器。
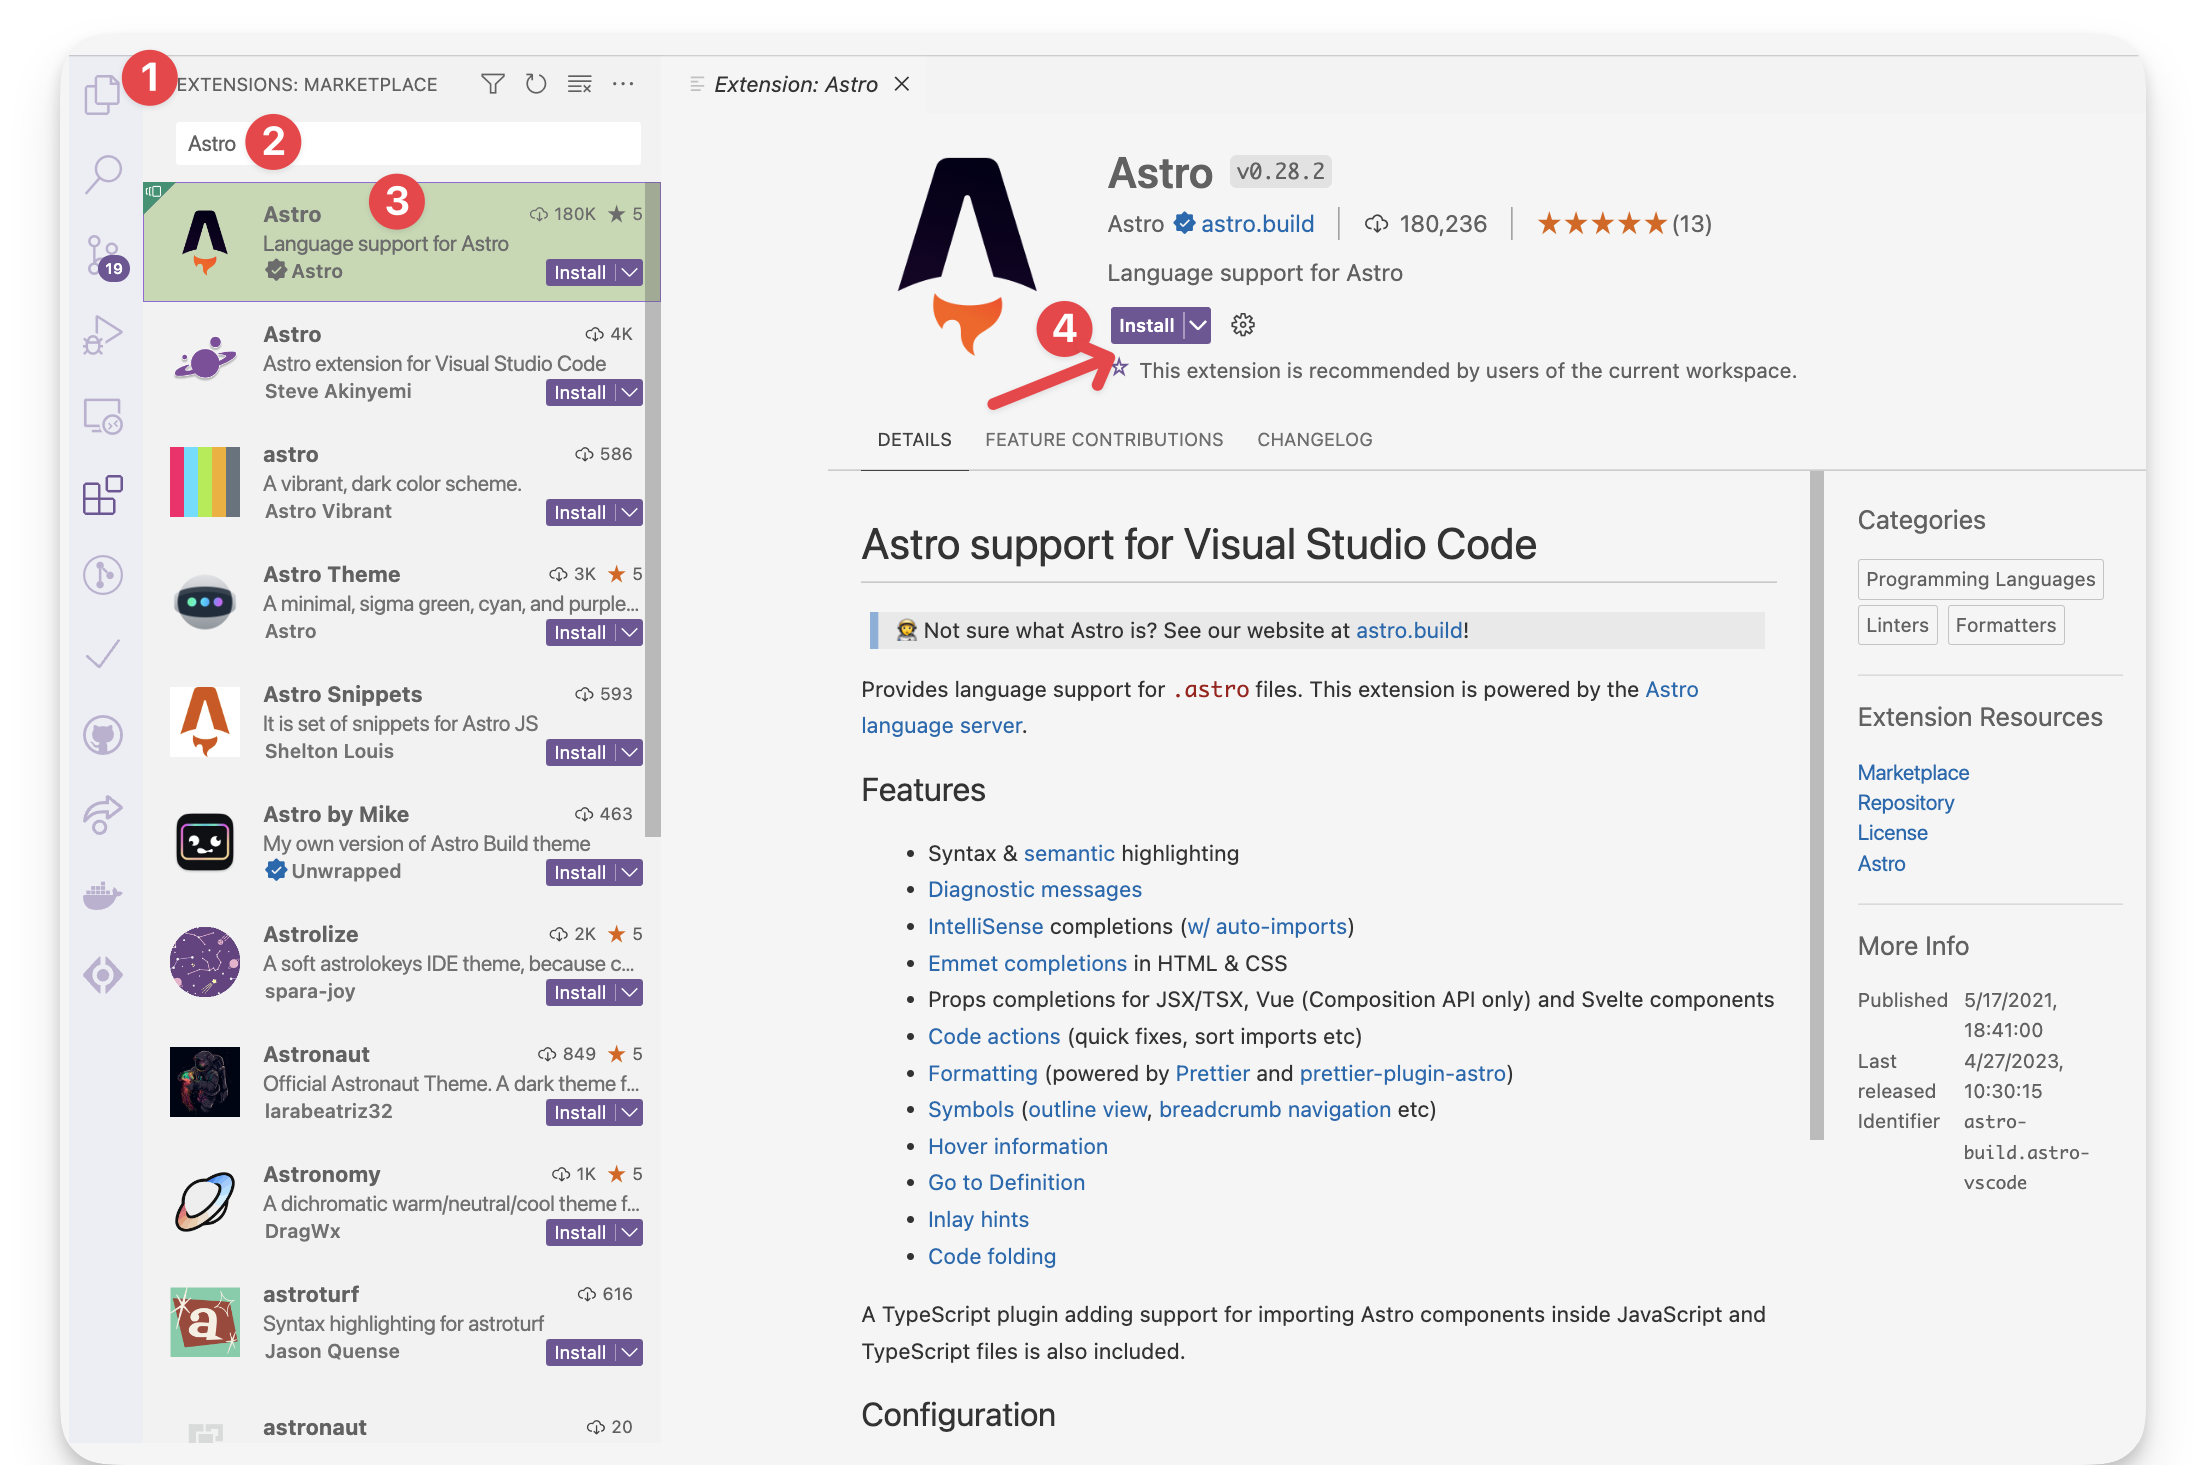
If you’re building with VSCode1, install the official Astro extension. This helps with syntax and semantic highlighting, diagnostic messages, IntelliSense, and more.
如果你使用VSCode 1 编译,请安装官方的Astro扩展。这有助于语法和语义突出显示、诊断消息、智能感知等。
The official Astro VSCode extension.
官方Astro VSCode扩展
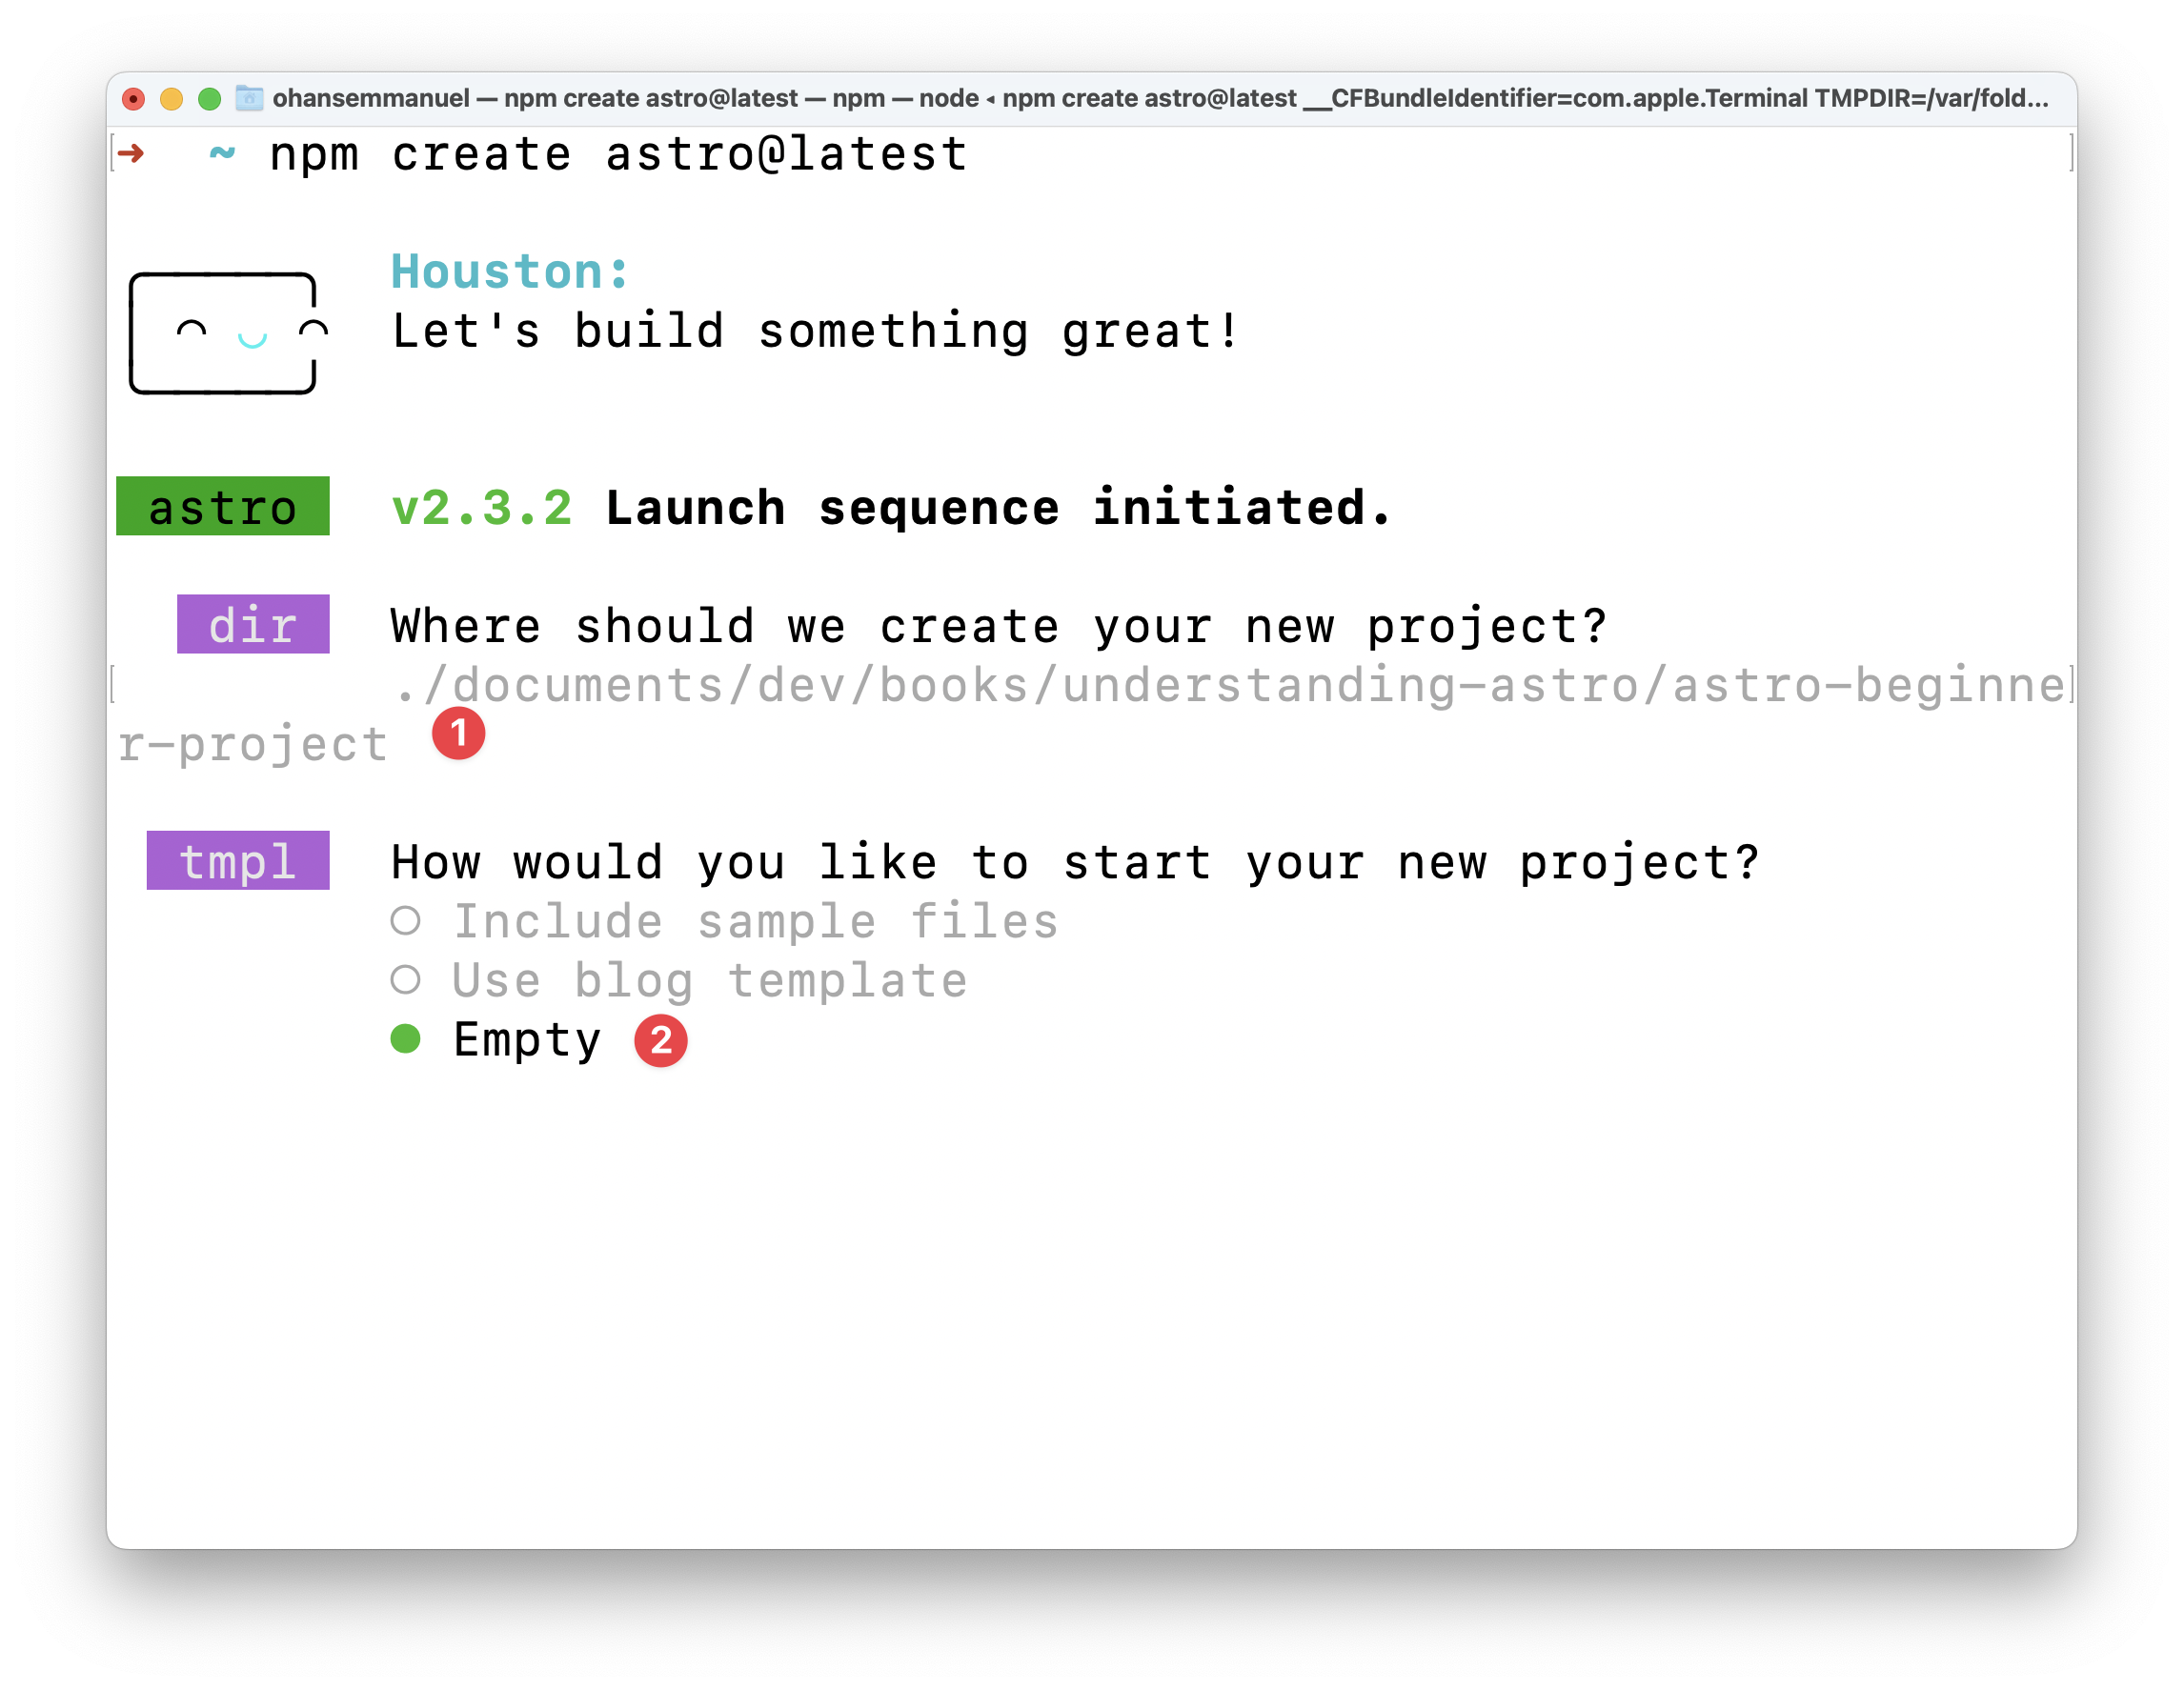
Let’s now get started setting up our first Astro project. To do this, we must install Astro, and the fastest way to do this is to use the Astro automatic CLI.
现在让我们开始设置我们的第一个Astro项目。要做到这一点,我们必须安装Astro,最快的方法是使用Astro自动CLI。
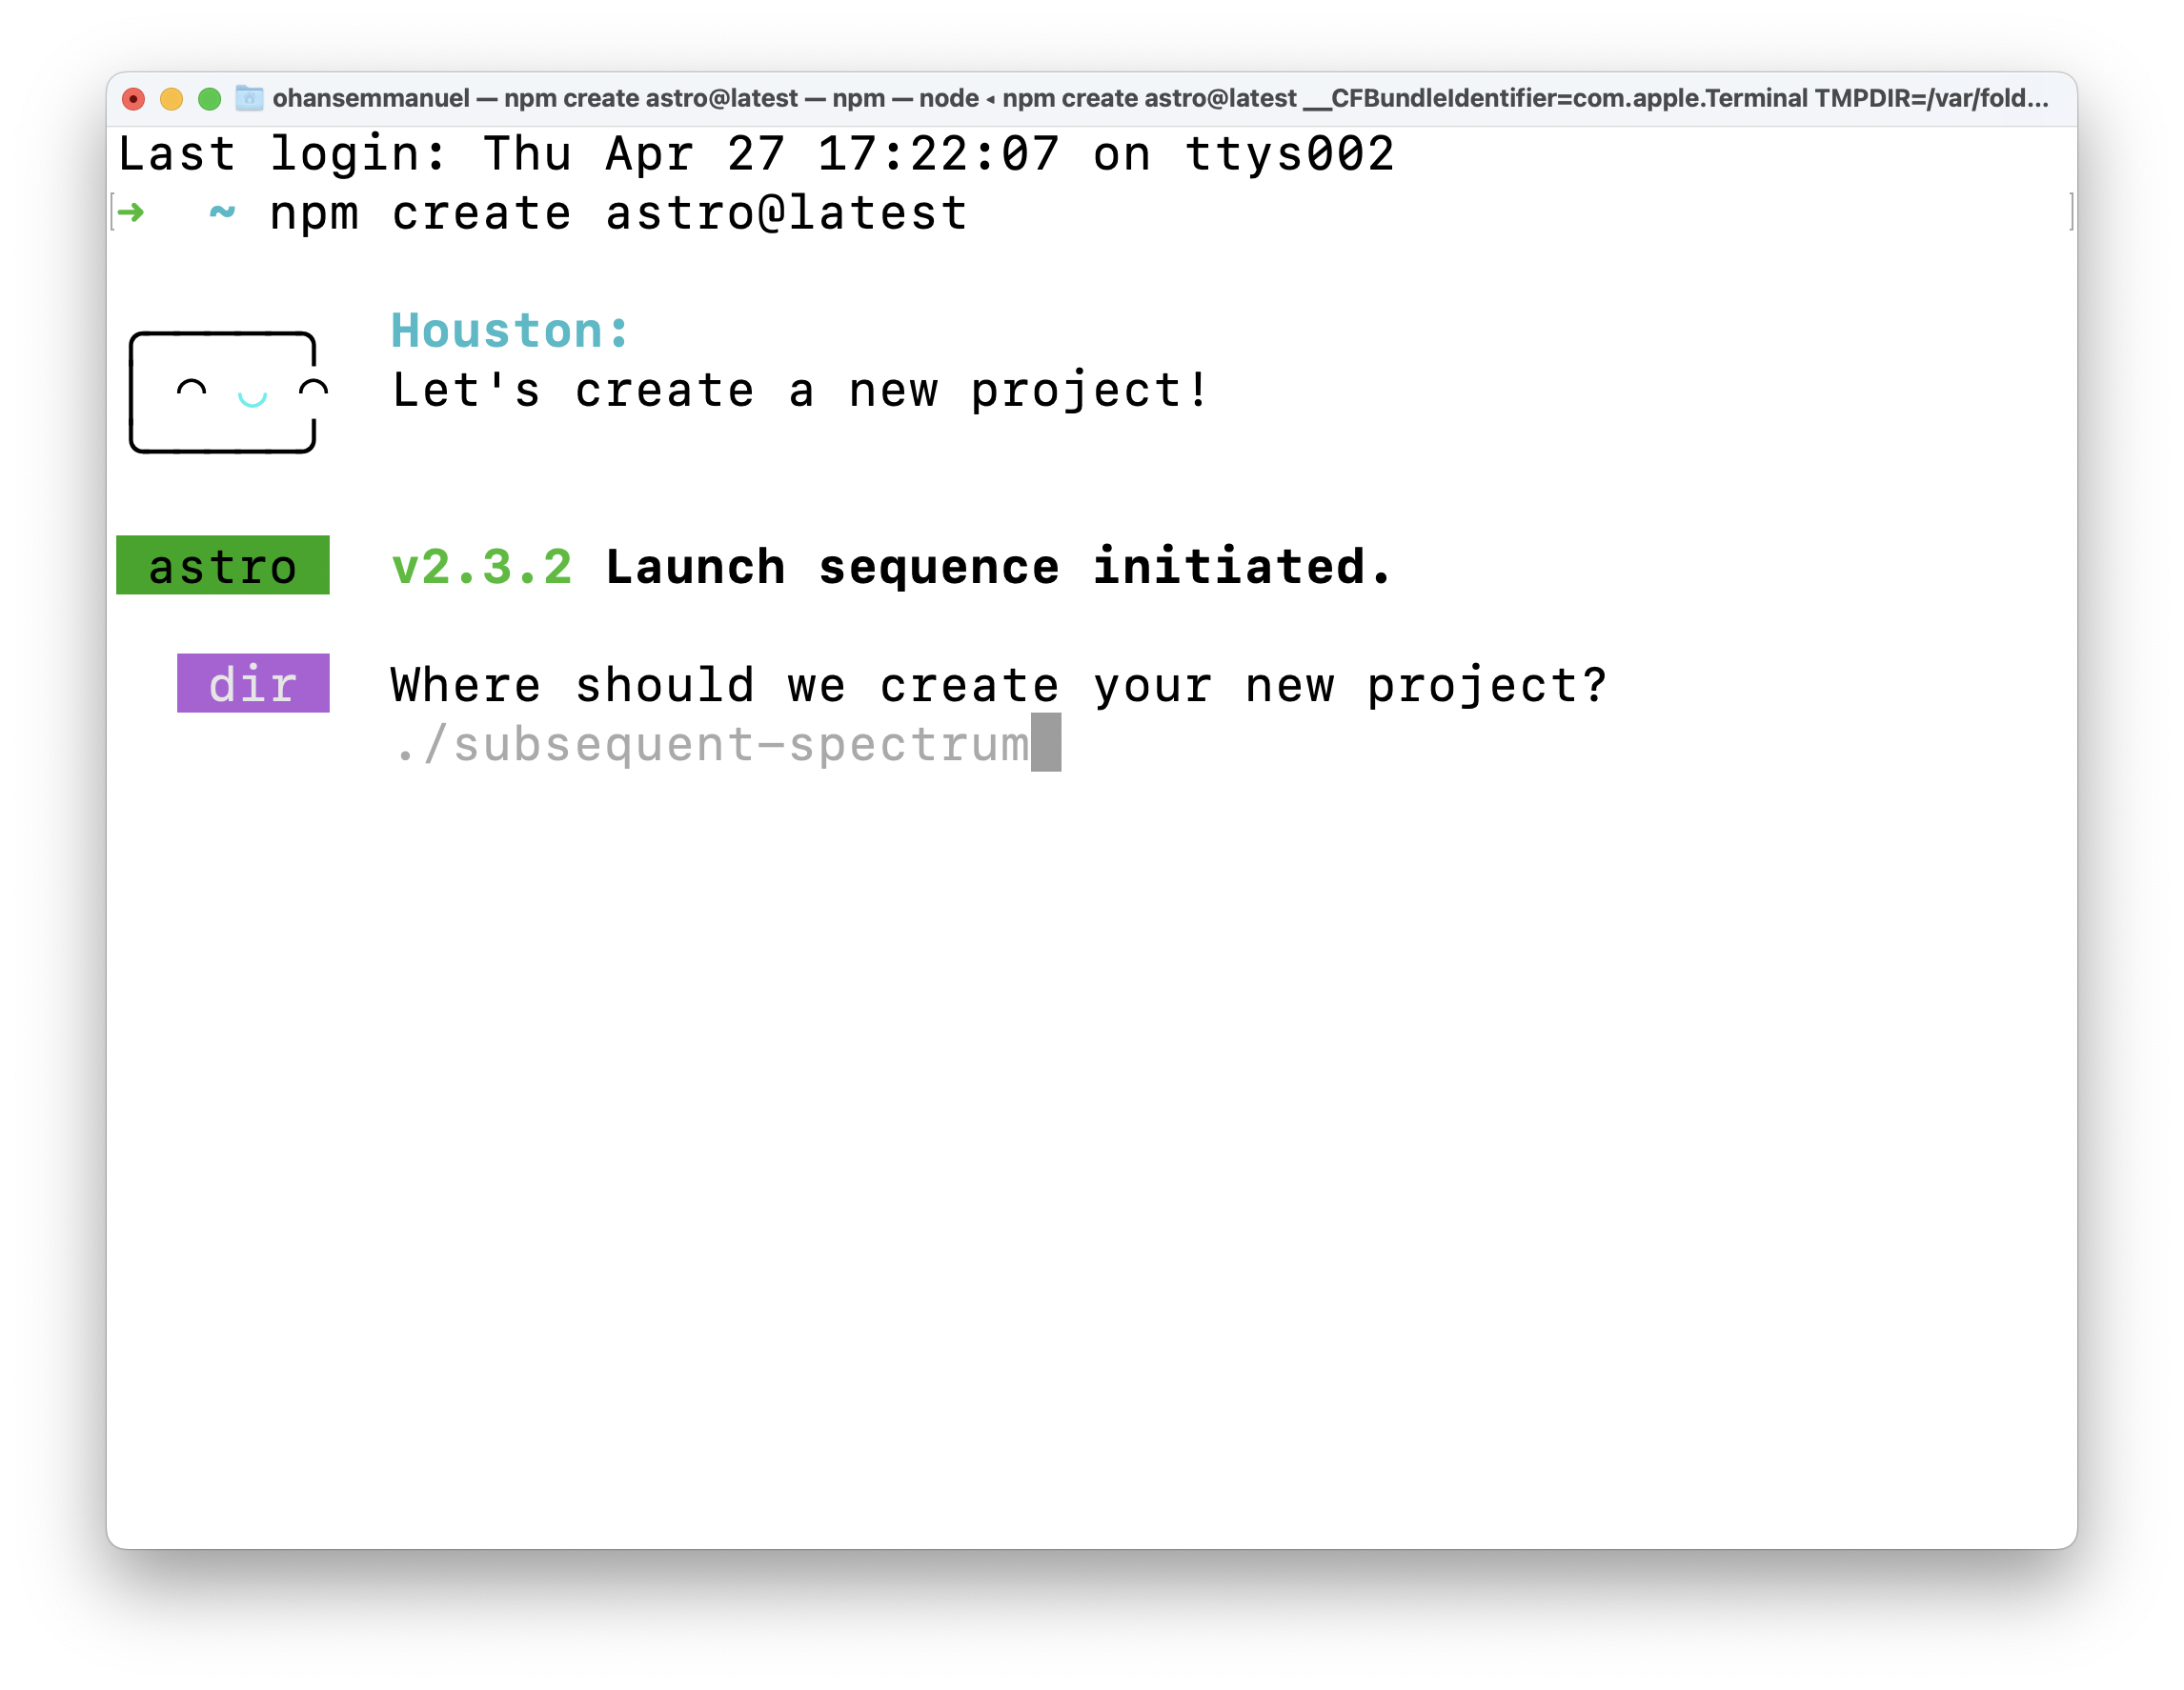
To start the install wizard, run the following command:
要启动安装向导,请运行以下命令:
npm create astro@latest
If on pnpm or yarn, the command looks as follows:
如果在 pnpm 或 yarn 上,命令如下所示:
using pnpm
pnpm create astro@latest
using yarn
yarn create astro
Starting a new project with the Astro CLI wizard extension.
使用Astro CLI向导扩展启动新项目。
This will start the wizard, which will guide us through helpful prompts. It’s important to mention that we can run this from anywhere on our machine and later choose where exactly we want the project created.
这将启动向导,向导将引导我们完成有用的提示。值得一提的是,我们可以在机器上的任何地方运行它,然后选择我们想要创建项目的确切位置。
When asked, “Where should we create your new project?” go ahead and pass a file path. In my case, this is documents/dev/books/understanding-astro/astro-beginner-project.
当被问到“我们应该在哪里创建您的新项目?“继续并传递文件路径。在我的情况下,这是 documents/dev/books/understanding-astro/astro-beginner-project 。
Alternatively, we could have run the npm create astro@latest command in our desired directory and just entered a shorter file path, e.g., ./astro-beginner-project.
或者,我们可以在所需的目录中运行 npm create astro@latest 命令,并输入一个较短的文件路径,例如,#1。
When asked, “How would you like to start your new project?” go ahead and choose “Empty”.
当被问到“你想如何开始你的新项目?“然后选择“空”。
Answering the template CLI prompt.
回答模板CLI提示符。
We want a fresh start to explore Astro from the ground up.
我们希望有一个新的开始,从地面上探索天文。
Now, we will be asked whether to install dependencies or not. Select yes and hit enter to continue the installation.
现在,我们将被询问是否安装依赖项。选择是并按回车键继续安装。
Installing dependencies in the CLI prompt.
在CLI提示符中安装依赖项。
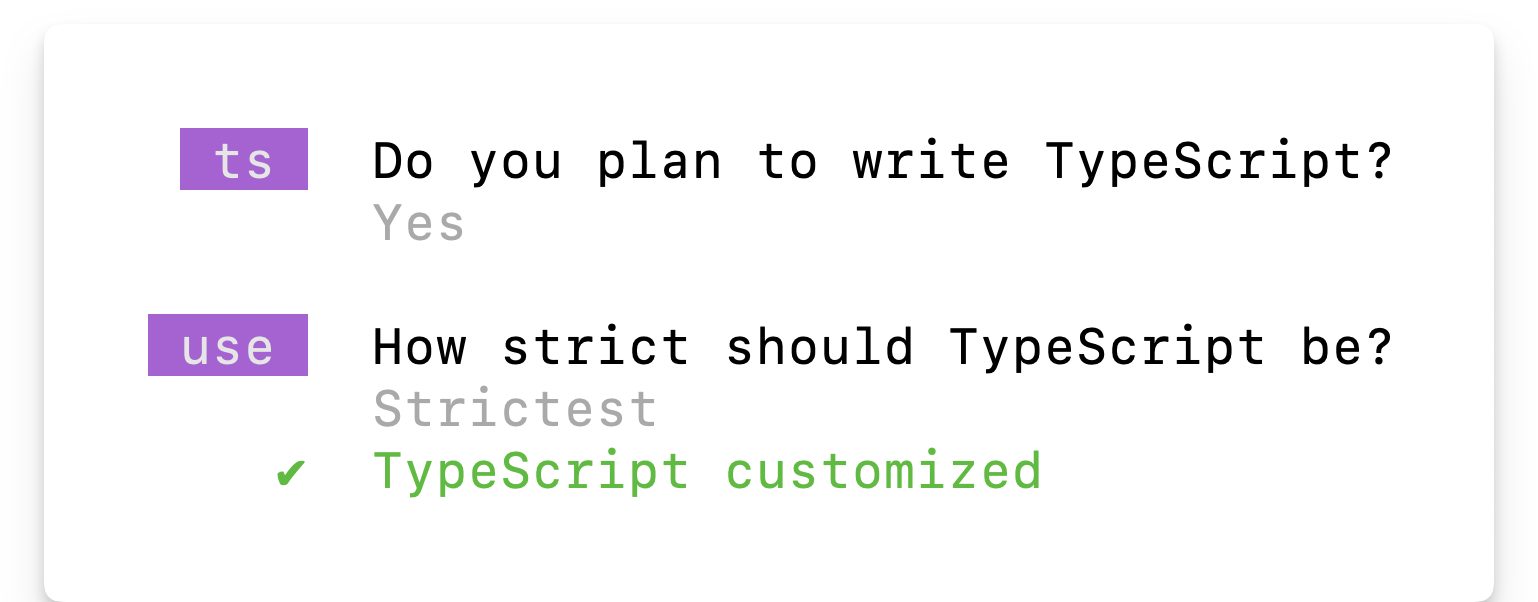
Once the dependencies are installed, answer the “Do you plan to write TypeScript?” prompt with a yes and choose the “strictest” option.
一旦安装了依赖项,回答“你打算写TypeScript吗?”“提示“是”并选择“最严格”选项。
We want strong type safety.
我们需要强大的类型安全。
Choosing Typescript in the CLI prompt.
在CLI提示符下选择Typescript。
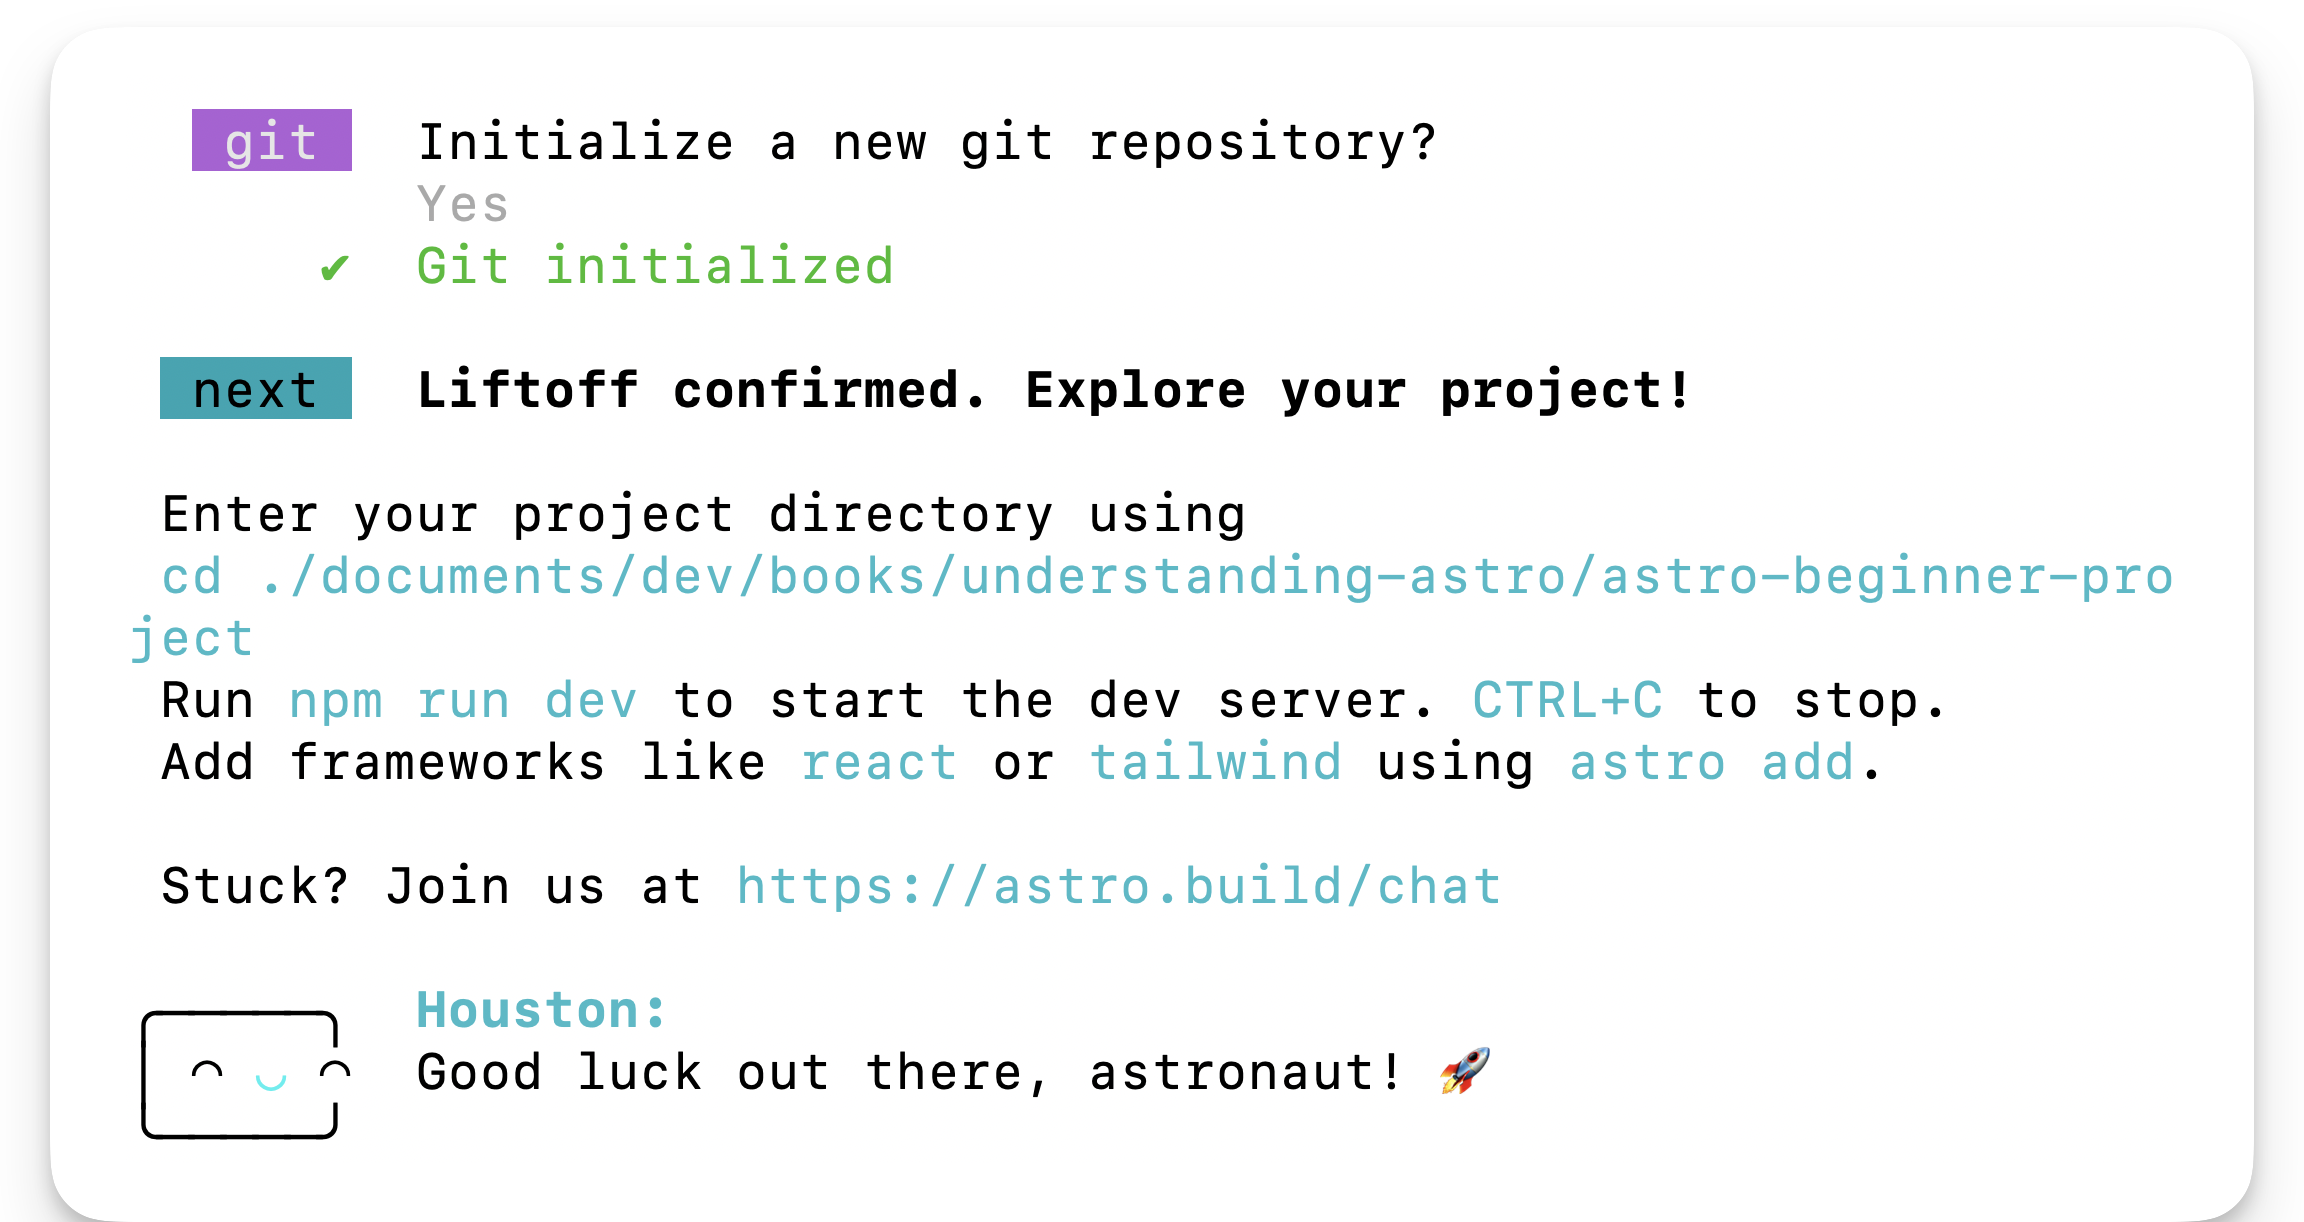
Afterwards, answer the “Initialise a new git repository?” question with whatever works for you. I’ll go with a yes here and hit enter.
然后,回答“初始化一个新的git仓库?“问什么适合你。我会选择通过然后按回车键。
Initialising git in the CLI prompt.
在CLI提示符下初始化git。
And voila! Believe it or not, our new project is created and ready to go!
瞧!信不信由你,我们的新项目已经创建并准备就绪!
Change into the directory where you set up the project. In my case, this looks like the following:
切换到设置项目的目录。在我的例子中,它看起来像下面这样:
cd ./documents/dev/books/understanding-astro/astro-beginner-project
And then run the application via the following:
然后通过以下方式运行应用程序:
npm run start
This will start the live application on an available local port 🚀
这将在可用的本地端口 🚀 上启动实时应用程序
The basic Astro project running on localhost:3000.
运行在localhost:3000上的基本Astro项目。
Project structure 项目结构
Open the newly created project in your code editor, and you’ll notice that the create astro CLI wizard has included some files and folders.
在代码编辑器中打开新创建的项目,您会注意到 create astro CLI向导包含了一些文件和文件夹。
Astro has an opinionated folder structure. We can see some of this in our new project. By design, every Astro project will include the following in the root directory:
Astro有一个固执己见的文件夹结构。我们可以在我们的新项目中看到这一点。根据设计,每个Astro项目将在根目录中包含以下内容:
File / Directory 文件/目录
astro.config.mjs
The Astro configuration file. This is where we provide configuration options for our Astro project.
Astro配置文件。这是我们为Astro项目提供配置选项的地方。
tsconfig.json
A Typescript configuration file. This specifies the root files and Typescript compiler options.
Typescript配置文件。这将指定根文件和Typescript编译器选项。
package.json
A JSON file that holds the project metadata. This is typically found at the root of most Node.js projects.
保存项目元数据的JSON文件。这通常位于大多数Node.js项目的根目录。
public/* 公共/*
This directory holds files and assets that will be copied into the Astro build directory untouched, e.g., fonts, images and files such as robots.txt
此目录保存将原封不动地复制到Astro构建目录中的文件和资产,例如,字体、图像和文件,如 robots.txt
src/* 简体中文
The source code of our project resides here.
我们项目的源代码就在这里。
Let’s now look at the files in our newly generated project.
现在让我们看看新生成的项目中的文件。
tsconfig.json
The content of our tsconfig.json file is the following:
我们的 tsconfig.json 文件的内容如下:
{ “extends”: “astro/tsconfigs/strictest” }
The extends property points to the base configuration file path to inherit from, i.e., inherit the typescript configuration from the file in astro/tsconfigs/strictest.
extends 属性指向要继承的基本配置文件路径,即,从 astro/tsconfigs/strictest 中的文件继承typescript配置。
Using your editor, we may navigate to the referenced path, e.g., in vscode by clicking on the link while holding CMD. This will navigate us to node_modules/astro/tsconfigs/strictest.json, where we’ll find a well-annotated file:
使用您的编辑器,我们可以导航到引用的路径,例如,在 vscode 中,按住 CMD 的同时单击链接。这将引导我们到 node_modules/astro/tsconfigs/strictest.json ,在那里我们将找到一个注释良好的文件:
{ … “compilerOptions”: { // Report errors for fallthrough cases in switch statements “noFallthroughCasesInSwitch”: true,
// Force functions designed to override their parent class to be specified as \`override\`.
"noImplicitOverride": true,

// Force functions to specify that they can return \`undefined\` if a possible code path does not return a value.
"noImplicitReturns": true,
 ...
} }
This is very well annotated, so we won’t spend time on this. However, the compilerOptions for Typescript are set in this file. The point to make here is Astro keeps a list of typescript configurations (base, strict and strictest) that our project leverage when we initialise via the CLI wizard.
这是非常好的注释,所以我们不会花时间在这上面。但是,在此文件中设置了Typescript的 compilerOptions 。这里要说明的一点是,Astro保留了一个类型脚本配置列表( base 、 strict 和 strictest ),当我们通过CLI向导进行初始化时,我们的项目可以利用这些列表。
In this example, we’ll leave the tsconfig.json file as is. Typescript (and consequently the tsconfig.json file is optional in Astro projects. However, I strongly recommend you leverage Typescript. We’ll do so all through the book.
在本例中,我们将保留 tsconfig.json 文件。Typescript(因此 tsconfig.json 文件在Astro项目中是可选的。但是,我强烈建议您使用Typescript。我们会在整本书中这样做。
package.json
The package.json file is easy to reason about. It holds metadata about our project and includes scripts for managing our Astro project, e.g., npm start, npm run build, and npm preview.
package.json 文件很容易推理。它保存有关我们项目的元数据,并包括用于管理我们Astro项目的脚本,例如, npm start , npm run build , npm preview 。
package-lock.json
The package-lock.json file is an autogenerated file that holds information on the dependencies/packages for our project. We won’t be touching this file manually. Instead, it is automatically generated (and updated) by npm.
package-lock.json 文件是一个自动生成的文件,它保存了我们项目的依赖项/包的信息。我们不会手动处理这个文件。相反,它由npm自动生成(和更新)。
A project’s lock file may differ depending on the package manager, e.g., yarn or pnpm.
项目的锁文件可能因包管理器而异,例如,纱线或PNPM。
astro.config.mjs
Most frameworks define a way for us to specify our project-specific configurations. For example, Astro achieves this via the astro.config file.
大多数框架都定义了一种方法,让我们指定特定于项目的配置。例如,Astro通过 astro.config 文件实现了这一点。
import { defineConfig } from “astro/config”;
export default defineConfig({});
At the moment, it defines an empty configuration. So we’ll leave it as is. However, this is the right place to specify different build and server options, for example.
此时,它定义了一个空的配置。所以我们就这样吧。但是,这是指定不同的构建和服务器选项的正确位置。
src/env.d.ts
d.ts files are called type declaration files2. Yes, that’s for Typescript alone, and they exist for one purpose: to describe the shape of some existing module. The information in this file is used for type checking by Typescript.
d.ts 文件被称为类型声明文件 2 。是的,那是仅针对Typescript的,它们存在的目的只有一个:来描述一些现有模块的形状。此文件中的信息用于Typescript的类型检查。
///
The content of the file points to astro/client. This is essentially a reference to another declaration file at astro/client.d.ts
文件的内容指向 astro/client 。这本质上是对另一个声明文件的引用,位于 astro/client.d.ts
src/pages/index.astro
As mentioned earlier, the src folder is where the source code for our project resides. But what’s the pages directory, and why’s there an index.astro file?
如前所述, src 文件夹是我们项目的源代码所在的位置。但是 pages 目录是什么,为什么有一个 index.astro 文件?
First, consider the contents of the index.astro file:
首先,考虑 index.astro 文件的内容:
--- ---
You’d notice that it looks remarkably similar to standard HTML, with some exceptions.
您会注意到它看起来与标准HTML非常相似,但有一些例外。
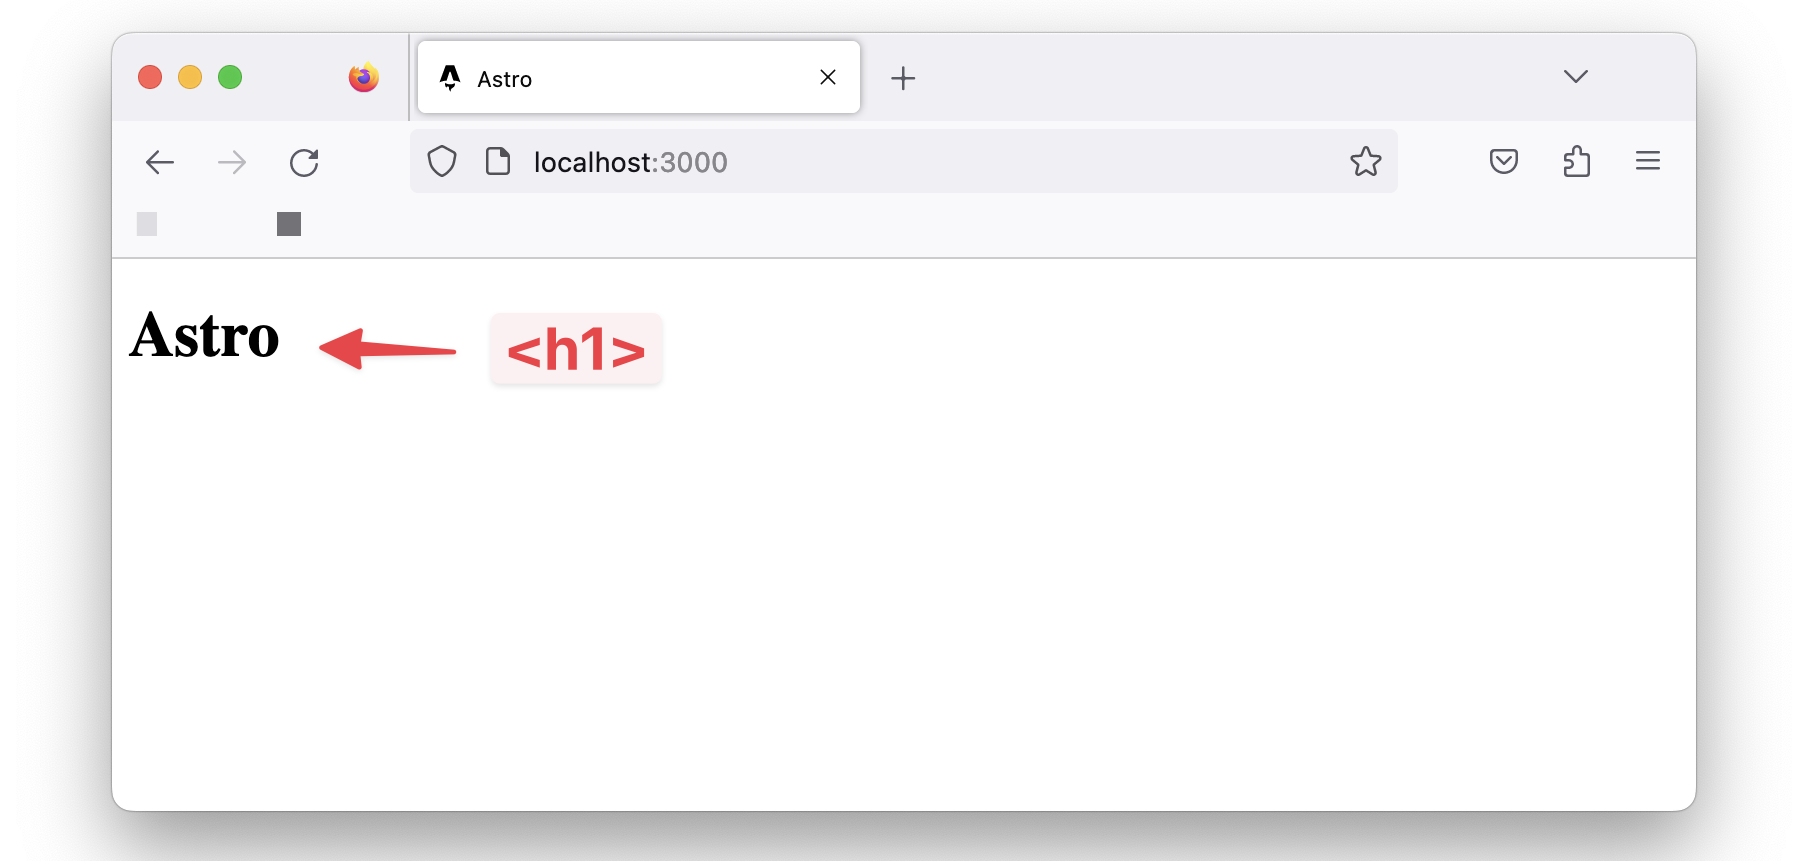
Also, notice what’s written within the <body> tag. An <h1> element with the text Astro.
另外,请注意 <body> 标记中所写的内容。带有文本 Astro 的 <h1> 元素。
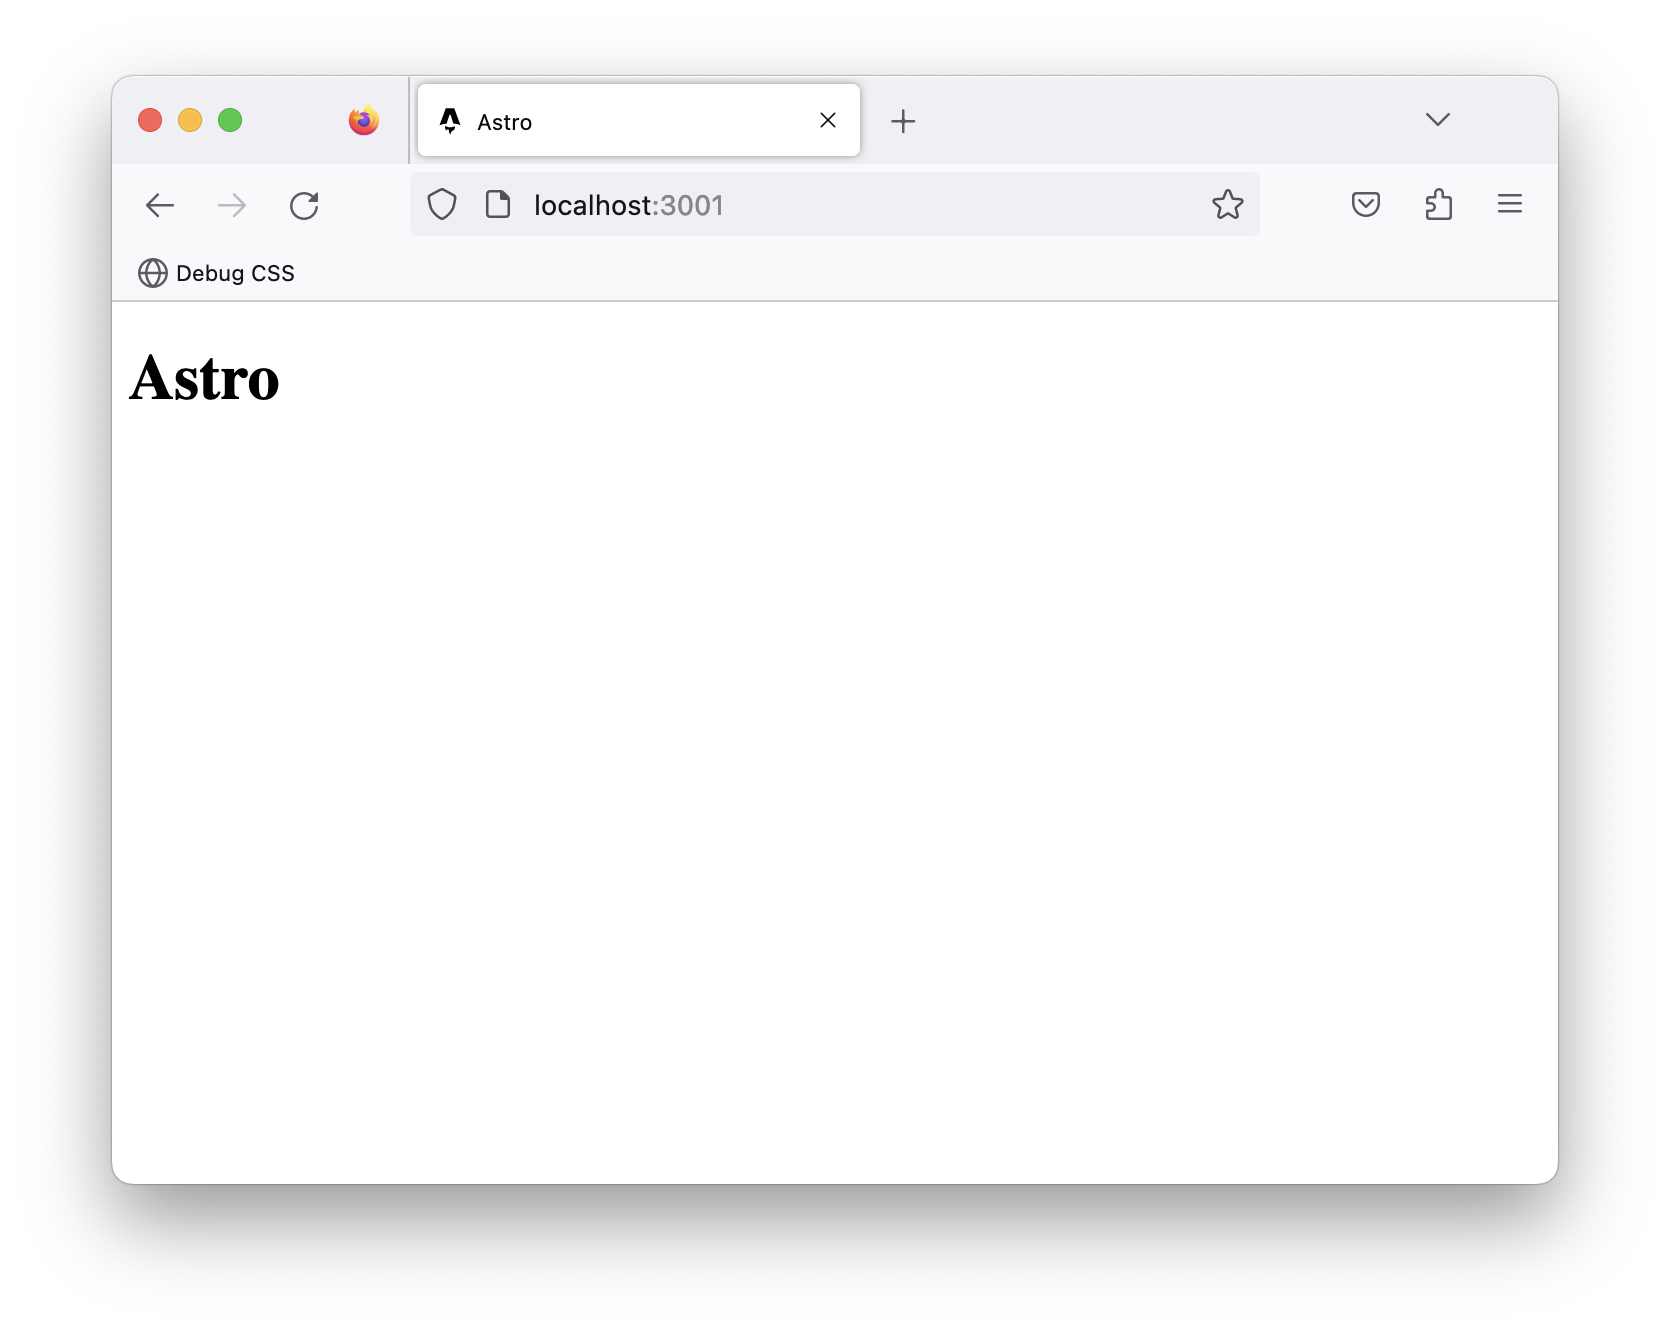
If we visit the running application in the browser, we have the <h1> rendered.
如果我们在浏览器中访问正在运行的应用程序,我们会呈现 <h1> 。
The rendered page heading.
呈现的页标题。
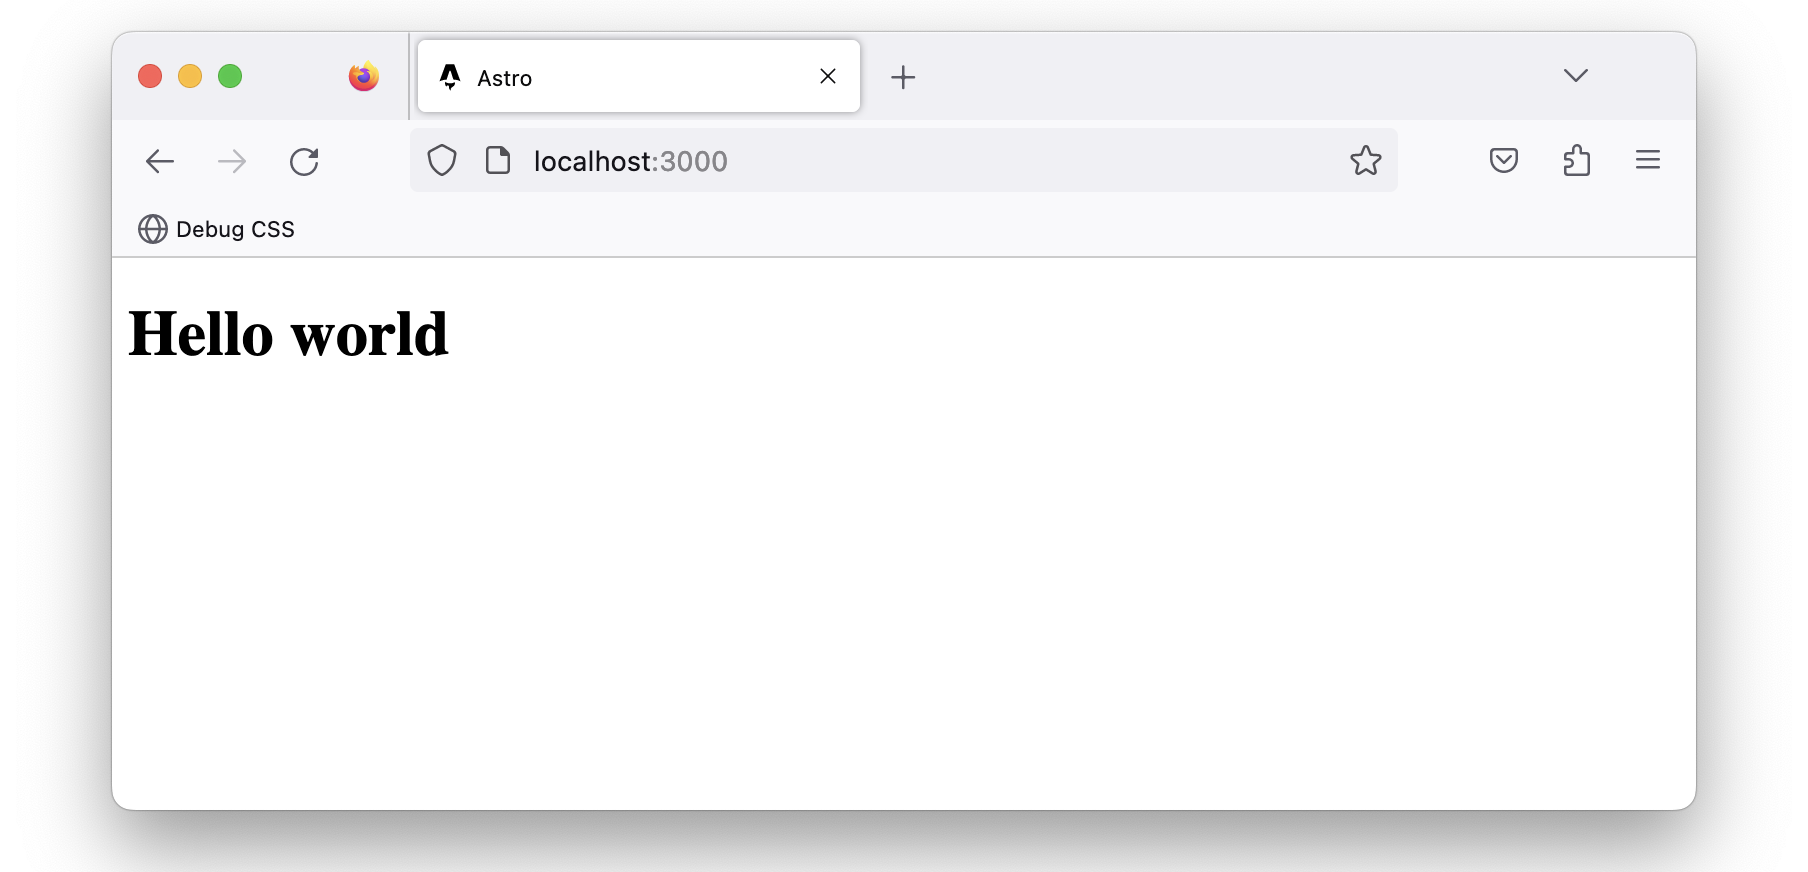
Now change the text to read <h1>Hello world</h1> and notice how the page is updated in the browser!
现在将文本更改为 <h1>Hello world</h1> ,并注意页面在浏览器中是如何更新的!
The updated page heading.
更新的页面标题。
This leads us nicely to discuss pages in Astro — what I consider the entry point to our application.
这让我们很好地讨论了Astro中的页面—我认为这是我们应用程序的入口点。
Introduction to Astro pages
Astro介绍页面
Astro leverages a file-based routing system and achieves this by using the files in the src/pages directory.
Astro利用基于文件的路由系统,并通过使用 src/pages 目录中的文件来实现这一点。
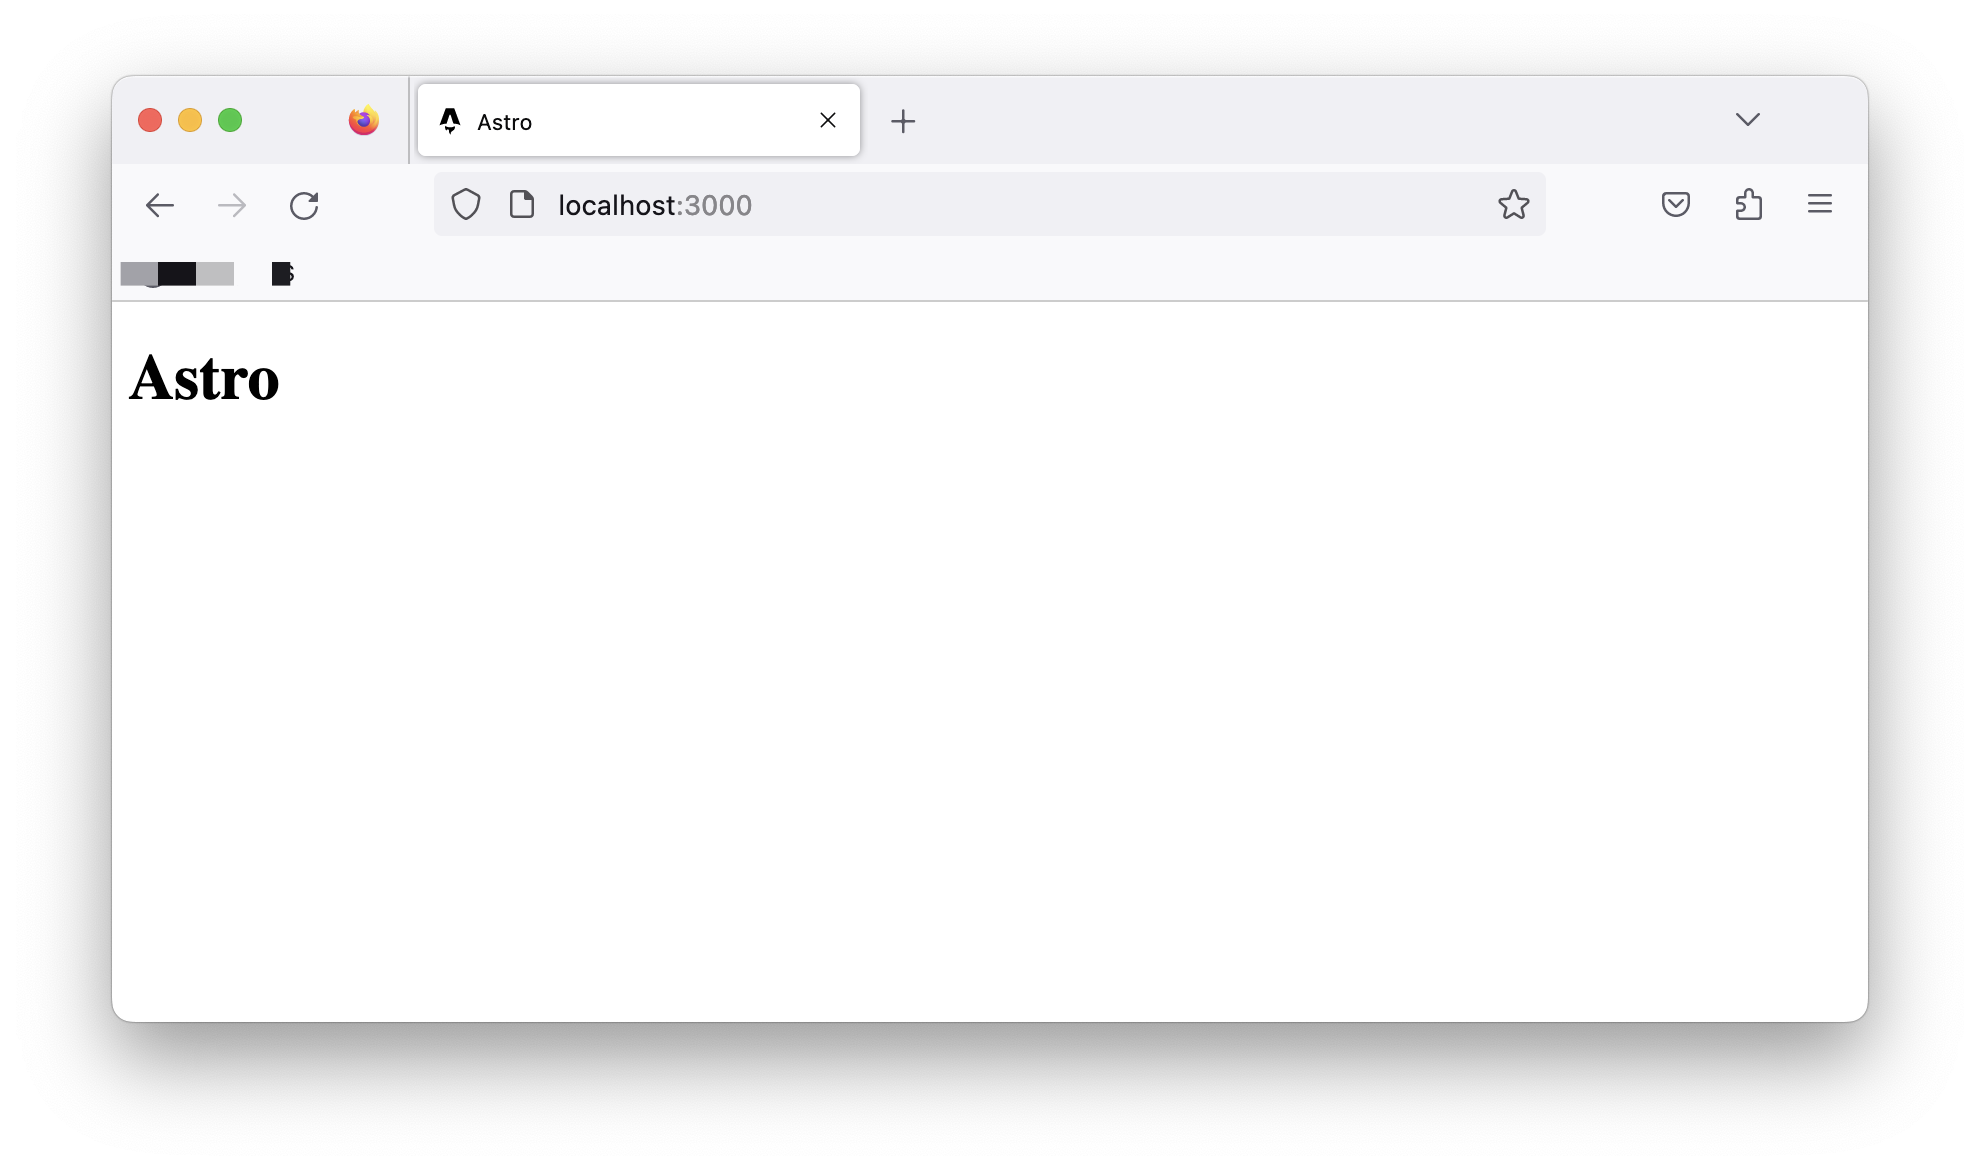
For example, the src/pages/index.astro file corresponds to the index page served in the browser.
例如, src/pages/index.astro 文件对应于浏览器中提供的 index 页面。
The project’s index page.
项目的索引页。
Let’s go ahead and create an src/pages/about.astro page with similar content to index.astro as shown below:
让我们继续创建一个与 index.astro 内容相似的 src/pages/about.astro 页面,如下所示:
// 📂 src/pages/about.astro --- ---
- Copy and paste the exact content of
index.astroinabout.astro.
将index.astro的确切内容复制并粘贴到about.astro中。 - Change the
<h1>to have the textAbout us.
将<h1>更改为文本About us。
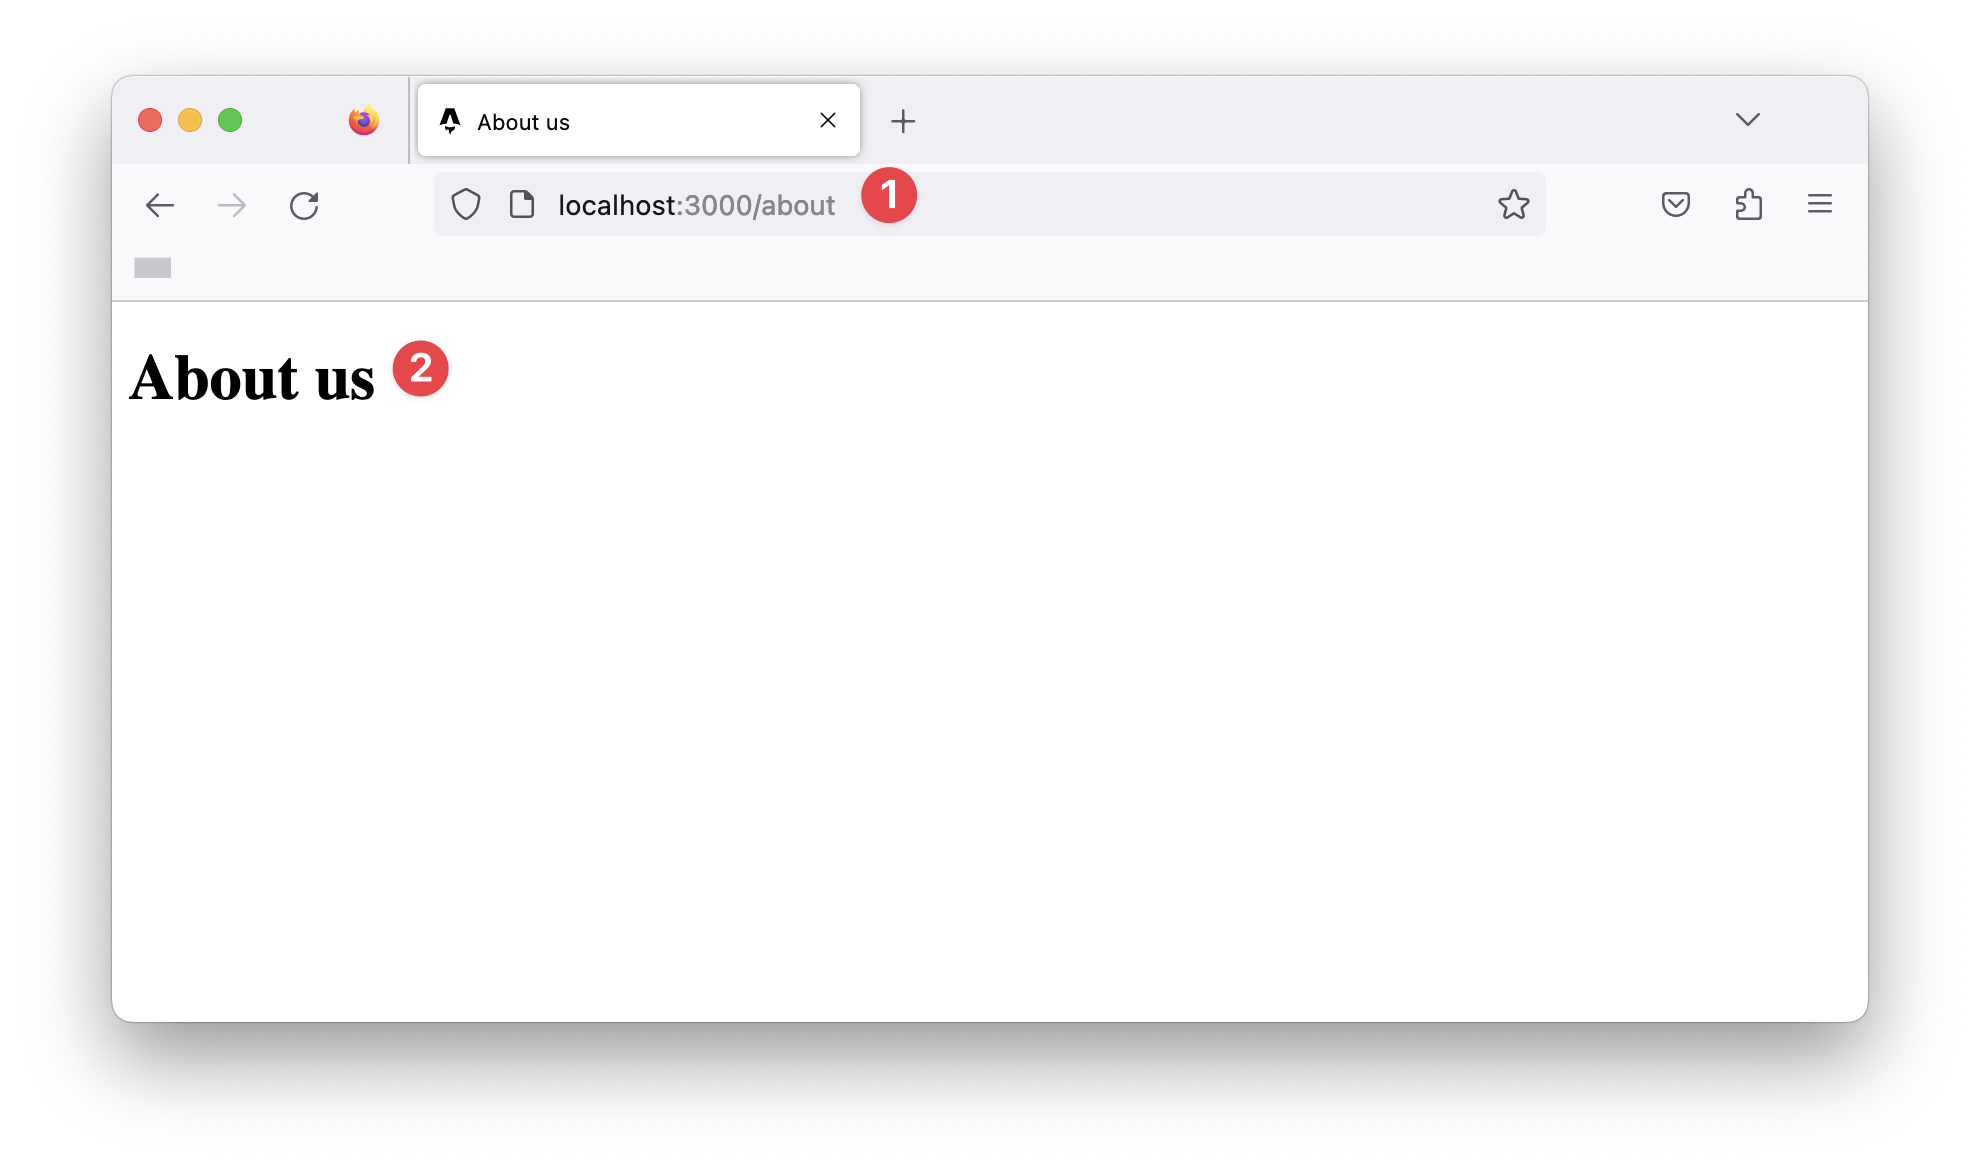
Now, if we navigate to /about in the browser, we should have the new page rendered.
现在,如果我们在浏览器中导航到 /about ,我们应该已经呈现了新页面。
The “About us” page.
关于我们页面
What makes a valid Astro page?
什么是有效的Astro页面?
We’ve defined Astro pages as files in the src/pages/directory. Unfortunately, this is only partly correct.
我们将Astro页面定义为 src/pages/ 目录中的文件。不幸的是,这只是部分正确。
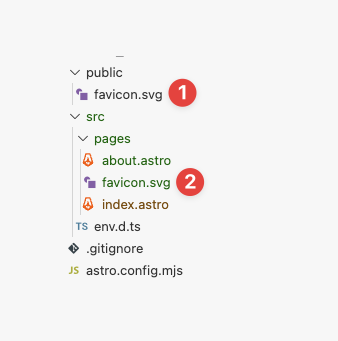
For example, if we duplicate the favicon.svg file in public/favicon.svg into the pages directory, does this represent a favicon page?
例如,如果我们将 public/favicon.svg 中的 favicon.svg 文件复制到 pages 目录中,这是否表示 favicon 页面?
Duplicating the favicon in the pages directory.
复制pages目录中的favicon。
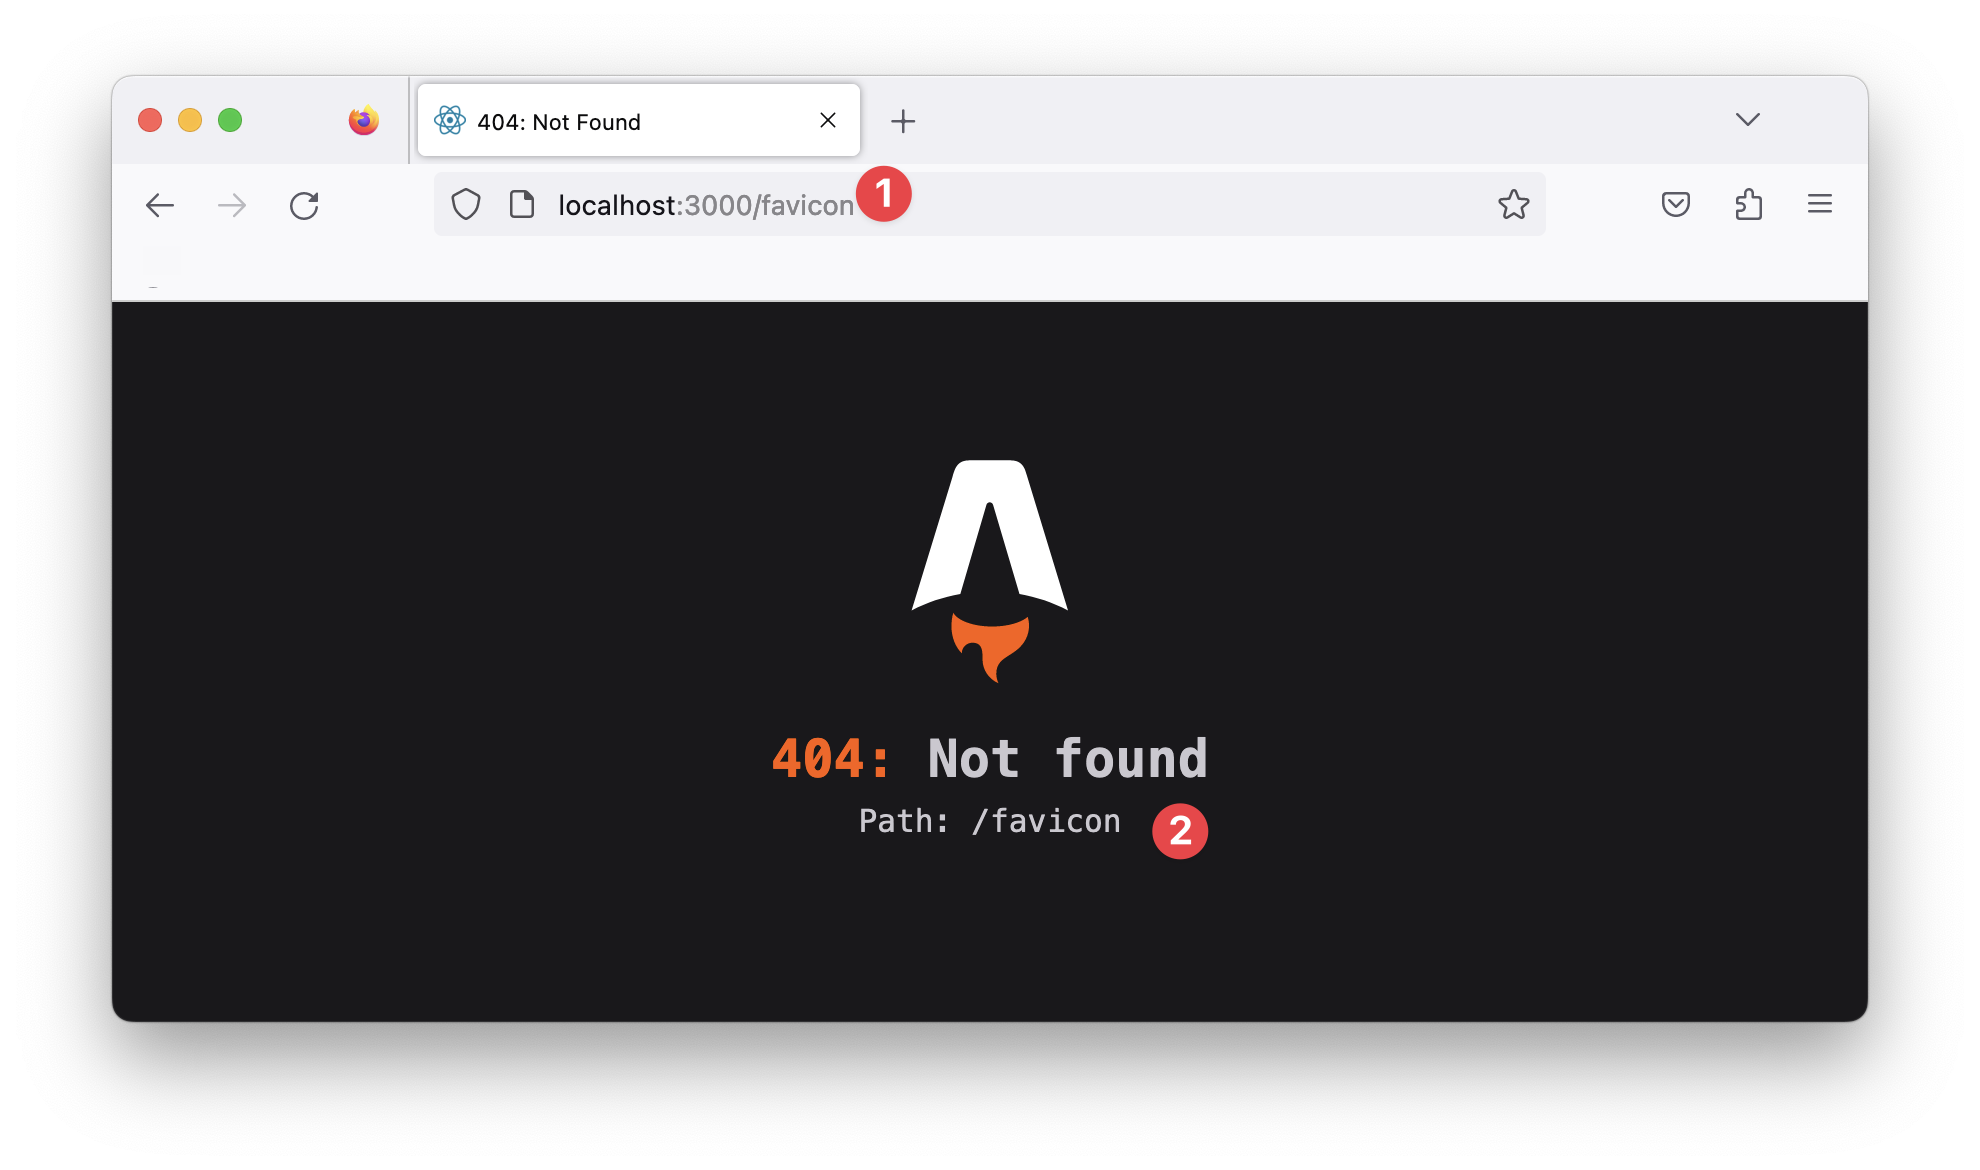
Even though index.astro and about.astro correspond to our website’s index and about pages, /favicon will return a 404: Not found error.
即使 index.astro 和 about.astro 对应于我们网站的索引和关于页面, /favicon 也会返回 404: Not found 错误。
The /favicon route. /favicon路由。
This is because only specific files make a valid astro page. For example, if we consider the index and about files in the pages directory, you perhaps notice something: they both have the .astro file ending!
这是因为只有特定的文件才能构成有效的astro页面。例如,如果我们考虑 pages 目录中的 index 和 about 文件,您可能会注意到一些事情:#3 ##
In layperson’s terms, these are Astro files, but a more technical terminology for these is Astro components.
在外行的术语中,这些是Astro文件,但这些文件的一个更专业的术语是Astro组件。
So, quick quiz: what is an Astro component?
快速问答:什么是Astro组件?
That’s easy—a file with the .astro ending.
这很简单-一个以 .astro 结尾的文件。
10 points to you! Well done.
给你10分!干得好
Anatomy of an Astro component
Astro组件的解剖结构
We’ve established that index.astro and about.astro represent Astro components and are valid Astro pages.
我们已经确定 index.astro 和 about.astro 代表Astro组件,并且是有效的Astro页面。
Now, let’s dig into the content of these files.
现在,让我们深入了解这些文件的内容。
Consider the contents of the index.astro page:
考虑 index.astro 页的内容:
// 📂 src/pages/index.astro --- ---
</html>
Notice the distinction between the two parts of this file’s content.
请注意此文件内容的两个部分之间的区别。
The section at the bottom contains the page’s markup:
底部的部分包含页面的标记:
// 📂 src/pages/index.astro // …
This part is called the component template section.
此部分称为组件模板部分。
While the top section contains a rather strange divider-looking syntax:
虽然顶部部分包含了一个相当奇怪的分隔符外观的语法:
--- ---
This part is called the component script section, and the --- is called fence.
这部分称为组件脚本部分, --- 称为围栏。
Together, these make up an Astro component.
它们一起构成了Astro组件。
Let’s take the component script section for a spin.
让我们来看看组件脚本部分。
The section’s name hints at what this section of the component does. Within the component script code fence, we may declare variables, import packages and fully take advantage of Javascript or Typescript.
该部分的名称暗示了组件的这一部分的功能。在组件脚本代码围栏中,我们可以声明变量,导入包,并充分利用JavaScript或Typescript。
Oh yes, Typescript! 是的,Typescript!
Let’s start by creating a variable to hold our user’s profile picture, as shown below:
让我们首先创建一个变量来保存用户的个人资料图片,如下所示:
// 📂 src/pages/index.astro --- const profilePicture = ”https://i.imgur.com/JPGFE75.jpg”; ---
We may then take advantage of the component template section to reference this image as shown below:
然后,我们可以利用组件模板部分来引用此图像,如下所示:
// 📂 src/pages/index.astro --- const profilePicture = ”https://i.imgur.com/JPGFE75.jpg”; ---
Note that the profilePicture variable is referenced using curly braces { }. This is how to reference variables from the component script in the component markup.
请注意,使用花括号 { } 引用 profilePicture 变量。这是如何在组件标记中引用组件脚本中的变量。
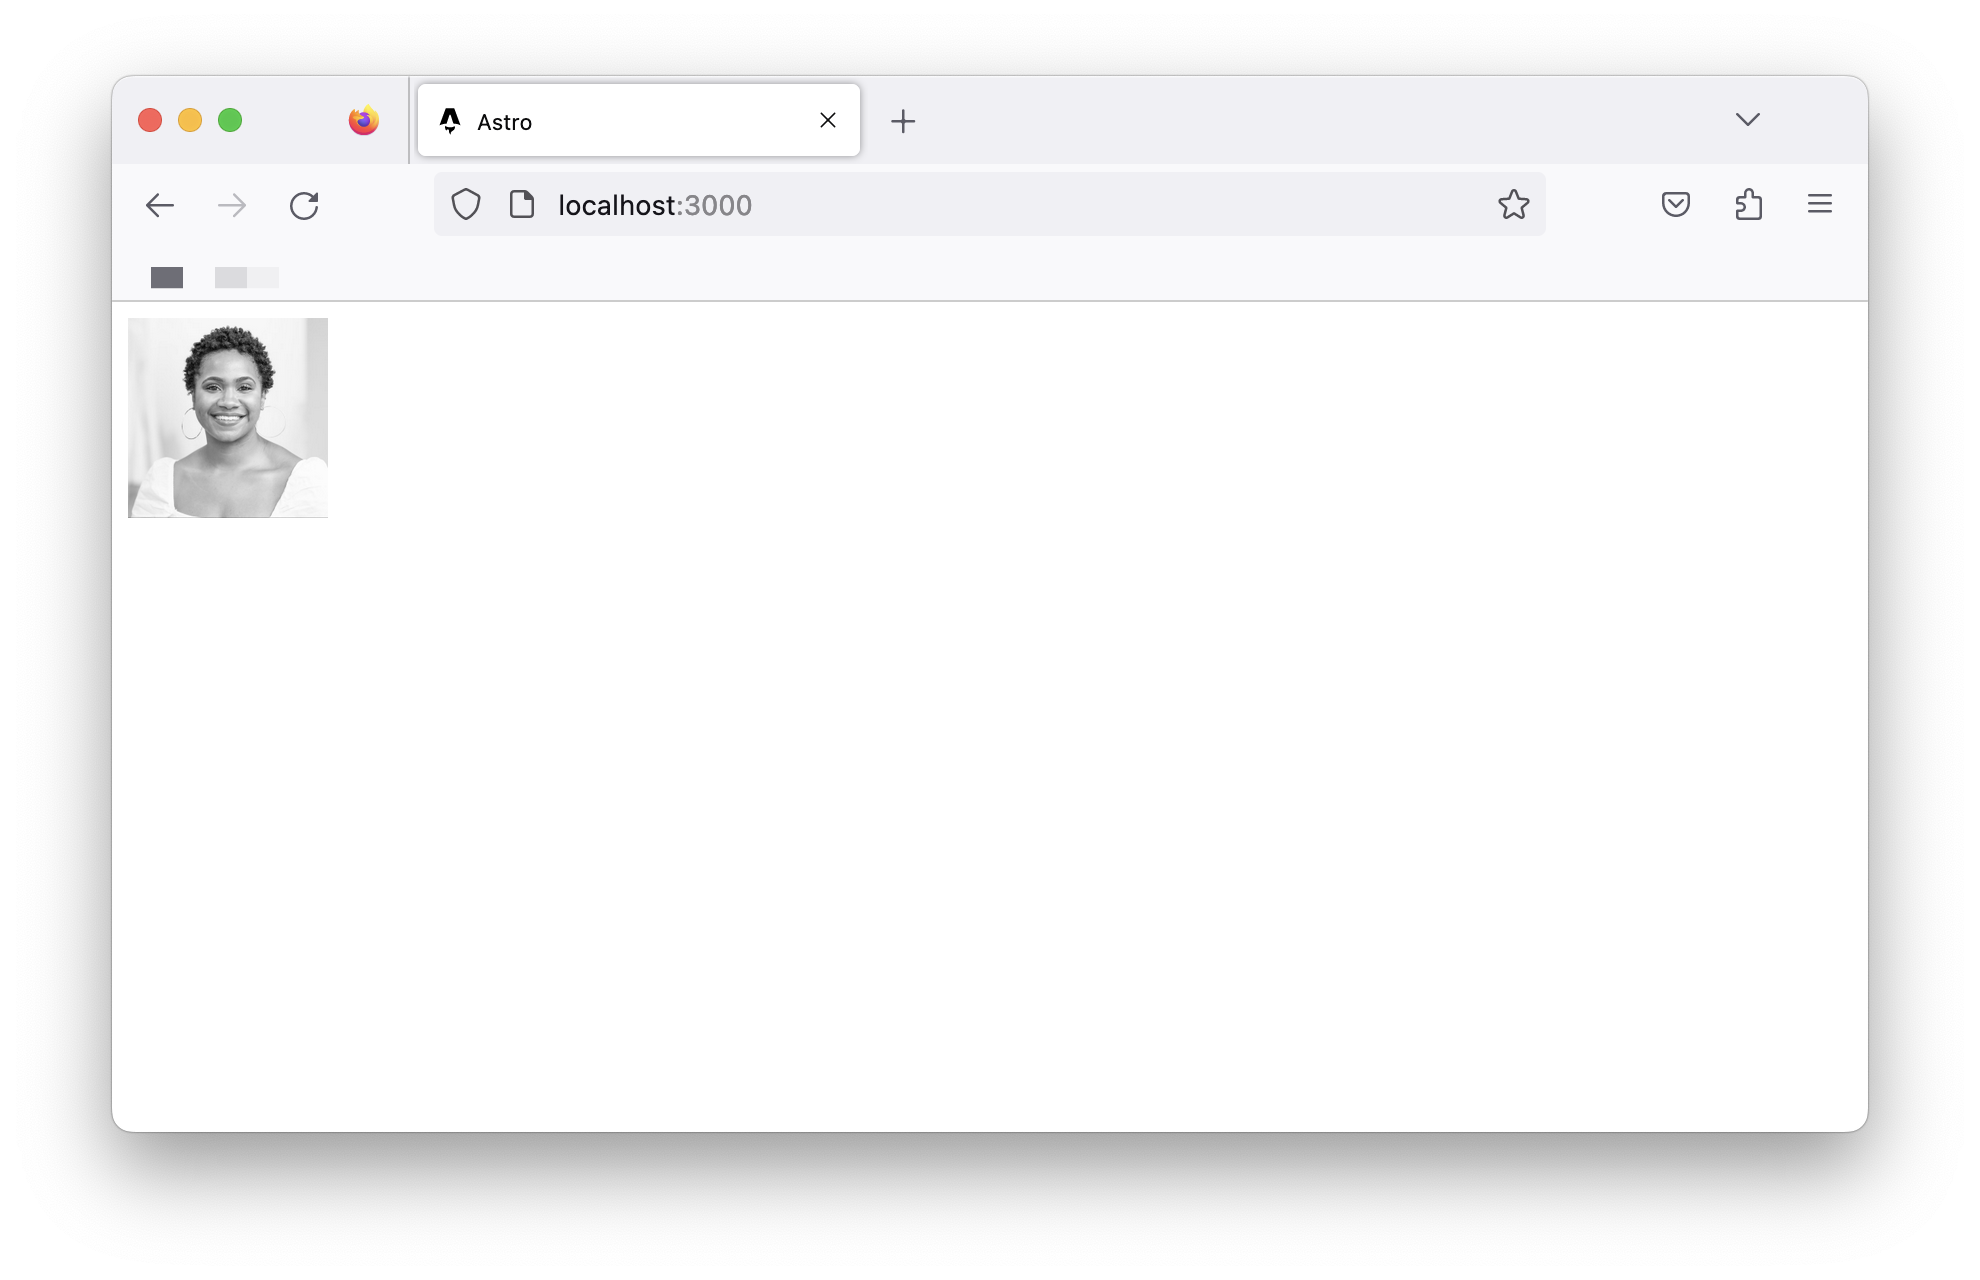
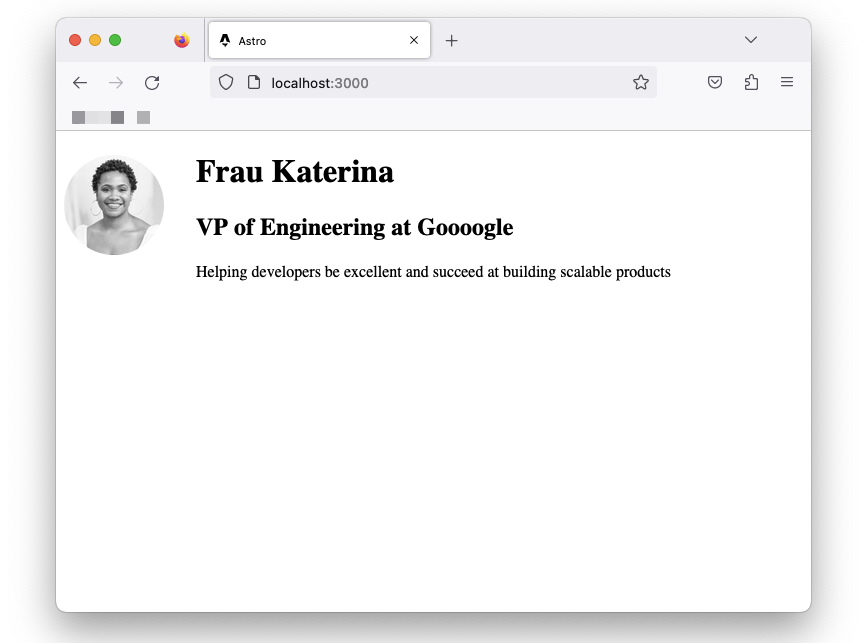
Now we should have the image rendered on the home page:
现在我们应该在主页上呈现图像:
Rendering the user profile photo.
正在渲染用户配置文件照片。
It’s not much, but it’s honest work, eh?
不多,但这是诚实的工作,嗯?
Let’s go ahead and flesh out the page to have the user’s profile markup:
让我们继续,充实页面以获得用户的配置文件标记:
// 📂 src/pages/index.astro // … <body> <!— Look here 👀 —> <div> <img src={profilePicture} alt=“Frau Katerina’s headshot.” width=“100px” height=“100px” /> <div> <h1>Frau Katerina</h1> <h2>VP of Engineering at Goooogle</h2> <p> Helping developers be excellent and succeed at building scalable products </p> </div> </div> </body> // …
As you might have noticed, we’re writing HTML looking syntax in the component markup section!
您可能已经注意到了,我们正在组件标记部分编写 HTML 外观语法!
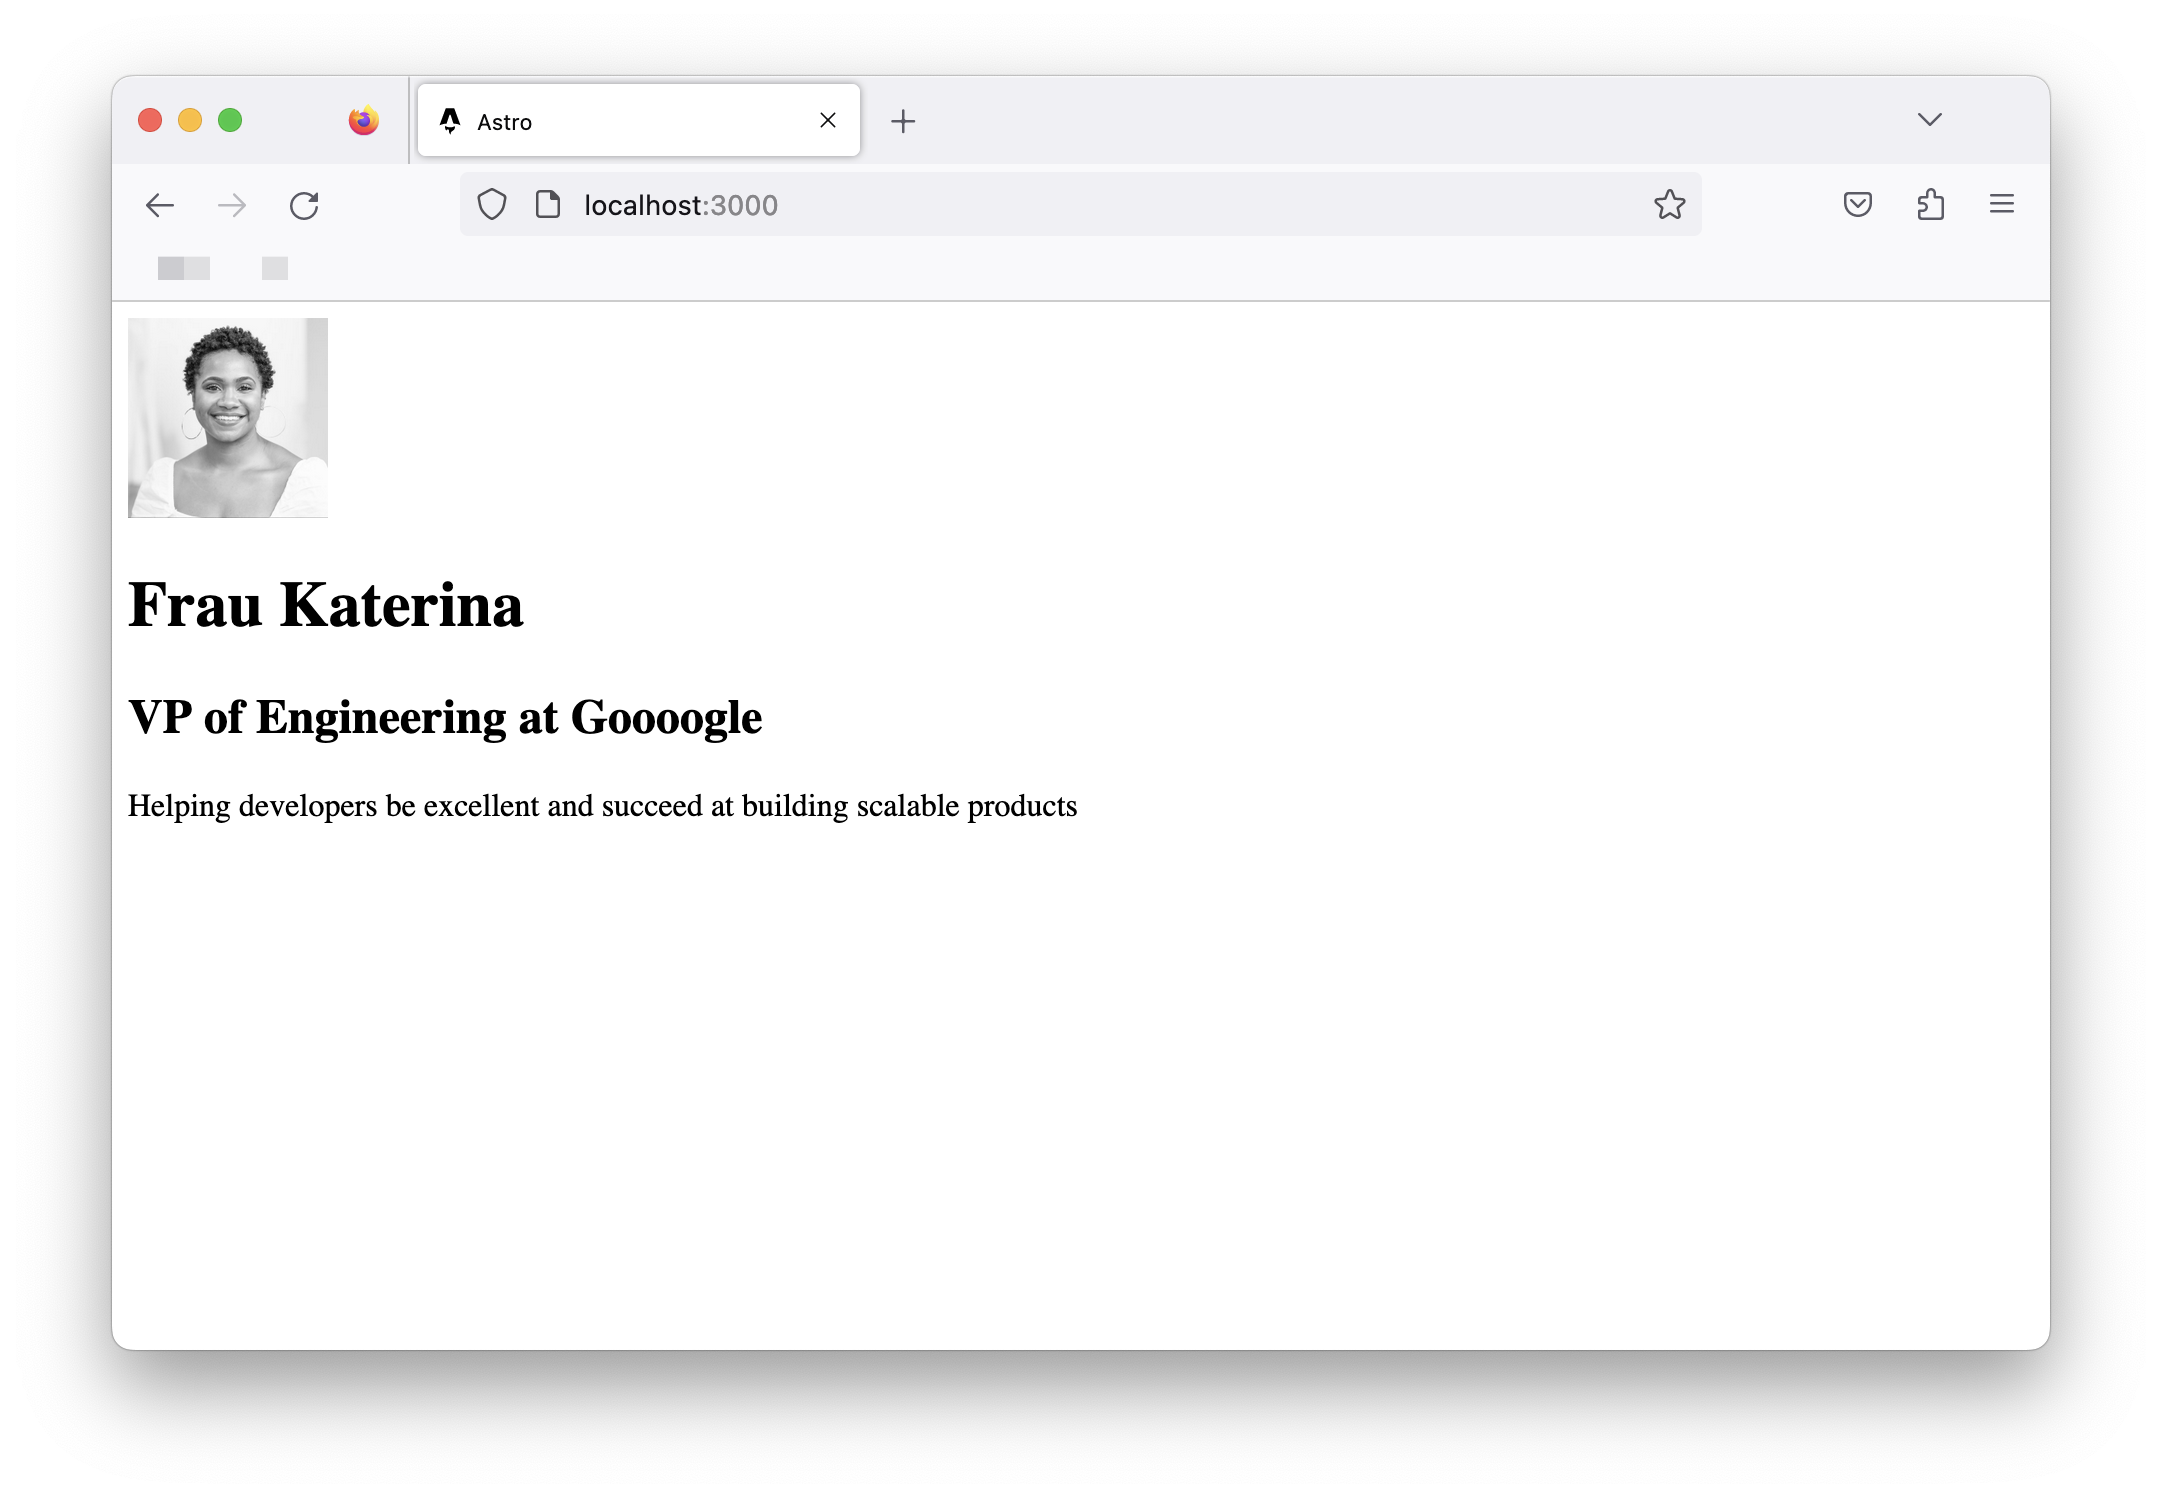
Now we should have the user photo and their bio rendered in the browser as follows:
现在,我们应该在浏览器中渲染用户照片和他们的个人信息,如下所示:
Component styles 组件样式
Styling in Astro is relatively easy to reason about. Add a <style> tag to a component, and Astro will automatically handle its styling.
Astro中的造型相对容易推理。向组件添加 <style> 标签,Astro将自动处理其样式。
While it’s possible to select elements directly, let’s go ahead and add classes to the component markup for ease:
虽然可以直接选择元素,但为了方便起见,让我们继续向组件标记添加类:
// 📂 src/pages/index.astro // …
Add a <style> tag, and write CSS as usual!
添加一个 <style> 标签,然后像往常一样编写CSS!
// … <style> .profile { display: flex; align-items: flex-start; flex-wrap: wrap; padding: 1rem 0 3rem 0; }
.profile__details { flex: 1 0 300px; }
.profile__details > h1 { margin-top: 0; }
.profile__picture { border-radius: 50%; margin: 0 2rem 1rem 0; } </style>
The user details should now be styled as expected.
现在,用户详细信息的样式应该符合预期。
Applying styles to the index.astro page component.
将样式应用于index.astro页面组件。
If we inspect the eventual styles applied to our UI elements via the browser developer tools, we’ll notice that the style selectors look different.
如果我们通过浏览器开发工具检查应用于UI元素的最终样式,我们会注意到样式选择器看起来不同。
For example, to style the user name, we’ve written the following CSS:
例如,为了设置用户名的样式,我们编写了以下CSS:
.profile__details > h1 { margin-top: 0; }
However, what’s applied in the browser looks something like this:
然而,在浏览器中应用的内容看起来像这样:
.profile__details
(.astro-J7PV25F6) > h1(.astro-J7PV25F6) { margin-top: 0; }Why is this? 为什么会这样呢?
The actual style declarations for the h1 element remain unchanged. The only difference here is the selector.
h1 元素的实际样式声明保持不变。这里唯一的区别是选择器。
The h1 element now has auto-generated class names, and the selector is now scoped via the :where CSS selector.
h1 元素现在有自动生成的类名,选择器现在通过 :where CSS选择器进行作用域控制。
This is done internally by Astro. This makes sure the styles we write don’t leak beyond our component; for example, if we styled every h1 in our component as follows:
这是由Astro内部完成的。这可以确保我们编写的样式不会泄漏到组件之外;例如,如果我们将组件中的每个 h1 样式化如下:
h1 { color: red; }
The eventual style applied in the browser will be similar to the following:
浏览器中应用的最终样式将类似于以下内容:
h1
(.astro-some-unique-id) { color: red; }This will ensure all other h1 in our project remains the same, and this style only applies to our specific component h1.
这将确保我们项目中的所有其他 h1 保持不变,并且这种风格仅适用于我们的特定组件 h1 。
Page layouts 页面布局
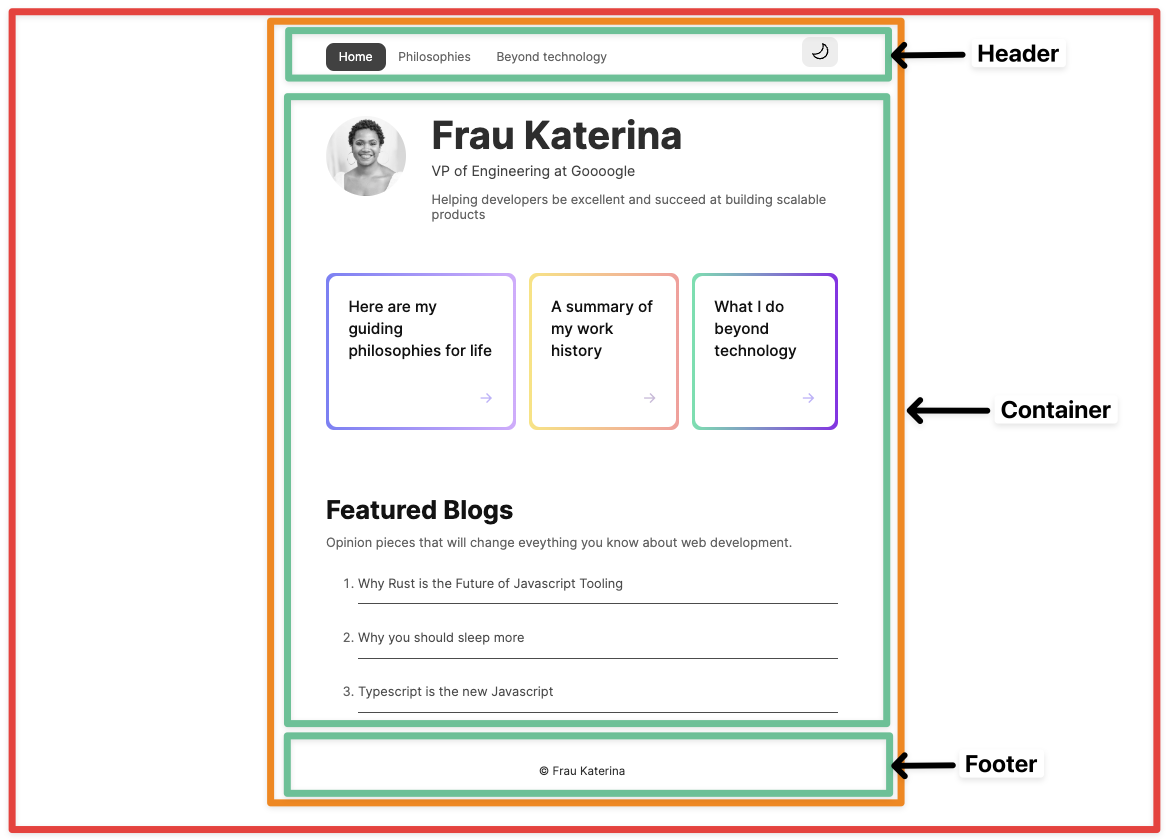
Please look at the pages of our completed application, and realise how they all have identical forms.
请看我们填写的申请表,并意识到它们都有相同的表格。
A breakdown of the application page structure.
应用程序页面结构的细分。
There’s a navigation bar, a footer, and some container that holds the page’s main content.
有一个导航栏、一个页脚和一些保存页面主要内容的容器。
Should we repeat these similar UI structures across all pages?
我们是否应该在所有页面上重复这些类似的UI结构?
Most people will answer “No”. So, is there a way to share reusable UI structures across pages?
大多数人会回答“不”。那么,有没有一种方法可以跨页面共享可重用的UI结构呢?
Yes, yes, yes! This is where layouts come in.
是的是的是的这就是布局的用武之地。
Layouts are Astro components with a twist. They are used to provide reusable UI structures across pages, e.g., navigation bars and footers.
布局是天文组件与扭曲。它们用于提供跨页面的可重用UI结构,例如,导航栏和页脚。
Conventionally, layouts are placed in the src/layouts directory. This is not compulsory but a widespread pattern.
通常,布局被放置在 src/layouts 目录中。这不是强制性的,而是一种普遍的模式。
Let’s go ahead and create our first layout in src/layouts/Main. We’ll do this by moving away all the reusable UI structures currently in index.astro as follows:
让我们继续在 src/layouts/Main 中创建第一个布局。我们将通过移除当前在 index.astro 中的所有可重用UI结构来做到这一点,如下所示:
// 📂 src/layouts/Main.astro --- ---
- We’ve moved the
<html>,<head>and<body>elements to theMain.astrolayout.
我们将<html>、<head>和<body>元素移到了Main.astro布局。 - We’ve also introduced a new
<meta name=description />tag for SEO.
我们还为SEO引入了一个新的<meta name=description />标签。 - We’ve equally introduced a
<main>element where we want the rest of our page to go in.
我们同样引入了一个<main>元素,我们希望页面的其余部分都可以进入其中。 - Note that the file name of the layout is capitalised, i.e.,
Main.astro, notmain.astro.
注意,布局的文件名大写,即,Main.astro不是main.astro
On the one hand, layouts are unique because they mostly do one thing - provide reusable structures. But, on the other hand, they aren’t unique. They are like other Astro components and can do everything a component can!
一方面,布局是独特的,因为它们主要做一件事-提供可重用的结构。但另一方面,它们并不是独一无二的。它们就像其他Astro组件一样,可以做组件所能做的一切!
Rendering components and slots
渲染组件和插槽
Rendering an Astro component is similar to how you’d attempt to render an HTML element, e.g., we’d render a div by writing the following:
呈现Astro组件类似于尝试呈现HTML元素的方式,例如我们会通过编写以下内容来渲染div:
<div>render something within the div</div>
The same goes for Astro components.
Astro组件也是如此。
To render the Main.astro component, we’d do similar:
为了渲染 Main.astro 组件,我们会做类似的事情:
<Main>render something within the Main component</Main>
Let’s put this into practice. We may now use the Main layout in the index.astro page. To do this, we will do the following:
让我们把这个付诸实践。我们现在可以在 index.astro 页面中使用 Main 布局。为此,我们将执行以下操作:
- Import the
Mainlayout from"../layouts/Main.astro"
从"../layouts/Main.astro"导入Main布局 - Substitute the
<html>,<head>and<body>elements for the<Main>layout inindex.astro.
将<html>、<head>和<body>元素替换为index.astro中的<Main>布局。
--- import Main from “../layouts/Main.astro”;
const profilePicture = ”https://i.imgur.com/JPGFE75.jpg”; ---
<Main>
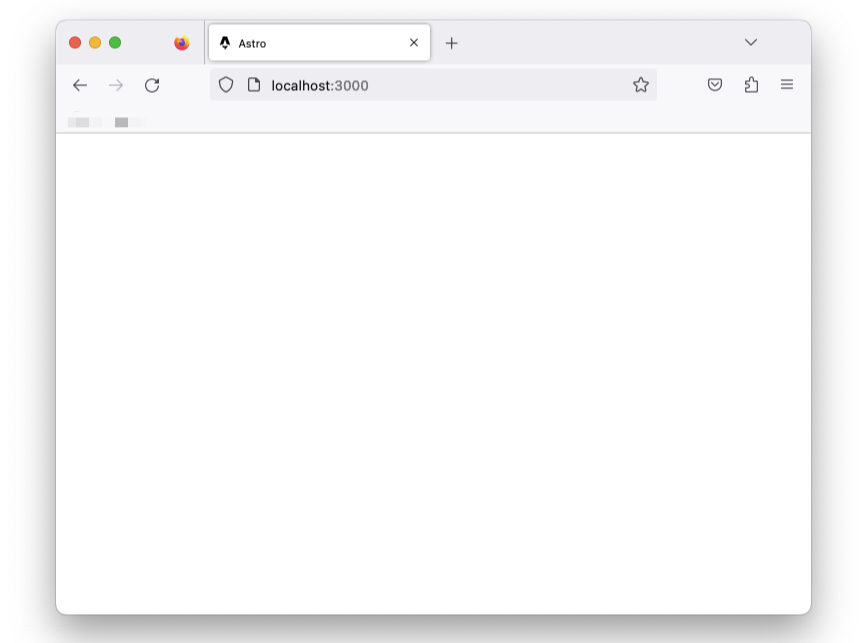
If we checked our app, we’d have a blank index page.
如果我们检查我们的应用程序,我们会有一个空白的 index 页面。
Blank application page. 空白申请页。
Why’s that? 为什么会这样?
Unlike HTML elements, the child elements in the <Main> tag aren’t automatically rendered.
与HTML元素不同, <Main> 标签中的子元素不会自动呈现。
{/** Child div will not be automatically rendered */} <Main> <div>Hello from child</div> <Main>
The <Main> layout component is rendered, and nothing else. The child components aren’t. Hence, the empty page.
渲染 <Main> 布局组件,除此之外什么也不渲染。子组件则不是。因此,空白页面。
To render the child elements of an Astro component, we must specify where to render these using a <slot /> element.
要渲染Astro组件的子元素,我们必须使用 <slot /> 元素指定渲染位置。
Injecting child elements into a slot.
将子元素注入到插槽中。
Let’s add a <slot> within Main.astro :
让我们在 Main.astro 中添加一个 <slot> :
//… <body> <main> {/* We want the content of each page to go here */} <slot /> </main> </body>
Page refactored to use a reusable layout component.
页面重构以使用可重用的布局组件。
We should now have our page rendered with the reusable layout in place.
我们现在应该用可重用布局呈现页面了。
Capitalising component names
大写组件名称
We’ve capitalised the file name of the Main.astro layout component but is this important?
我们已经将 Main.astro 布局组件的文件名大写,但这重要吗?
Theoretically, the answer to that is no.
理论上,答案是否定的。
We could create a file with a lower cased name, e.g., mainLayout.astro and import the component as follows:
我们可以创建一个小写的文件名,例如, mainLayout.astro 并按如下方式导入组件:
import Main from “../layouts/mainLayout.astro”;
This is perfectly correct.
这是完全正确的。
However, where we encounter issues is if we name the imported component with a lowercase:
但是,如果我们用小写字母命名导入的组件,就会遇到问题:
// main NOT Main import main from “../layouts/mainLayout.astro”;
In this case, we’ll encounter issues when we attempt to render the component as the name collides with the standard HTML main element.
在本例中,当我们试图呈现组件时,会遇到问题,因为组件名称与标准HTML main 元素冲突。
For this reason, it’s common practice to capitalise both component file names and the imported variable name.
因此,通常的做法是将组件文件名和导入的变量名大写。
The global style directive
全局样式指令
The Main layout is in place but doesn’t add much to our page. Let’s start by adding some styles for the headers and also centre the page’s content:
Main 布局已经到位,但并没有为我们的页面添加太多内容。让我们首先为标题添加一些样式,并将页面的内容居中:
<style> h1 { font-size: 3rem; line-height: 1; }
h1 + h2 { font-size: 1.1rem; margin-top: -1.4rem; opacity: 0.9; font-weight: 400; }
main { max-width: 40rem; margin: auto; } </style>
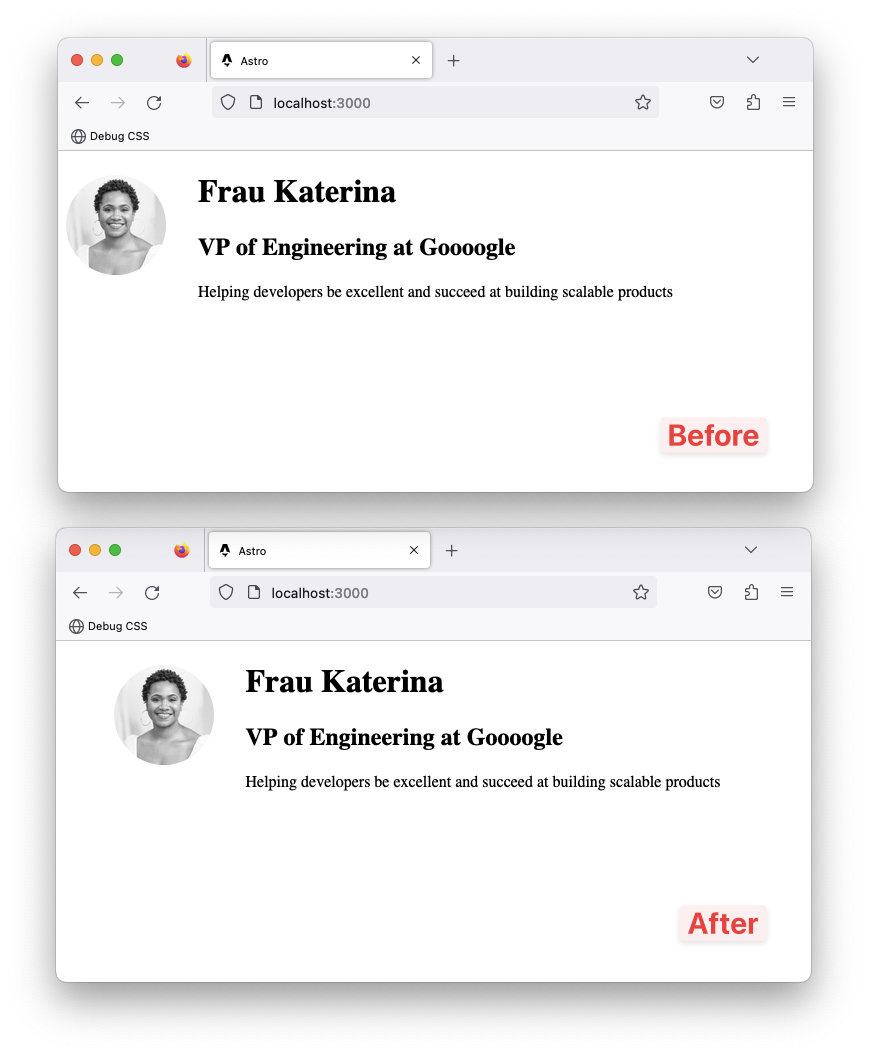
With this, we’ll have the main element centred, but the headers, h1 and h2 remain unstyled.
这样,我们将以 main 元素为中心,但标题 h1 和 h2 保持未样式化。
A comparison of the changes before and after the layout component style.
布局构件样式前后的更改比较。
This is because styles applied via the <style> tag are locally scoped by default.
这是因为通过 <style> 标记应用的样式默认情况下是本地范围的。
Can you tell me why?
你能告诉我为什么吗?
The main element resides in the Main layout. However, the header h1 and h2 exist in a different index.astro component!
main 元素位于 Main 布局中。然而,头 h1 和 h2 存在于不同的 index.astro 组件中!
For our use case, we need global styles.
对于我们的用例,我们需要全局样式。
We need to break out of the default locally scoped styles the Astro component provides, but how do we do this?
我们需要打破Astro组件提供的默认本地范围样式,但是我们如何做到这一点呢?
Global styles can be a nightmare — except when truly needed. For such cases, Astro provides several solutions. The first is using what’s known as a global style template directive.
全局样式可能是一场噩梦—除非真正需要。对于这种情况,Astro提供了几种解决方案。第一种是使用所谓的全局样式模板指令。
I know that sounds like a mouthful! However, in simple terms, template directives in Astro are different kinds of HTML attributes that can be used in Astro component templates3.
我知道这听起来很拗口!然而,简单地说,Astro中的模板指令是可以在Astro组件模板 3 中使用的不同类型的HTML属性。
For example, to break out of the default locally scoped <style> behaviour, we can add a is:global attribute as shown below:
例如,为了打破默认的本地作用域 <style> 行为,我们可以添加一个 is:global 属性,如下所示:
For example, consider the unstyled flash of content when we refresh our home page. For a user who chose the dark theme previously, refreshing the page shows light-themed rendered content before changing to dark after the script is parsed.
例如,当我们刷新我们的主页时,考虑一下无样式的内容。对于之前选择了深色主题的用户,刷新页面时会显示浅色主题的渲染内容,然后在脚本解析后更改为深色。
Transitioning light themed content viewed on Regular 3G throttling.
在常规3G节流上观看的过渡灯光主题内容。
This occurs because we restore the user-chosen theme only after the page’s HTML has been parsed, i.e, the default behaviour of processed Astro scripts.
这是因为我们只在页面的HTML被解析后,即默认的Astro脚本行为,恢复用户选择的主题。
To prevent this, we will use the is:inline directive, which will make the script blocking, i.e., executed immediately and stops parsing until completed.
为了防止这种情况,我们将使用 is:inline 指令,这将使脚本阻塞,即:立即执行并停止解析直到完成。
Since scripts with the is:inline attribute aren’t processed, they’ll be added multiple times if used in reusable components that appear more than once on the page.
由于具有 is:inline 属性的脚本不会被处理,因此如果在页面上出现多次的可重用组件中使用,它们将被添加多次。
So, let’s go ahead and move the theme restoration code bit into Main.astro — because the Main layout is only included once per page.
因此,让我们继续前进,并将主题恢复代码位移动到 Main.astro 中-因为 Main 布局仅在每个页面中包含一次。
We’ll also make sure to add this within the <head> of the layout, as shown below:
我们还将确保将其添加到布局的 <head> 中,如下所示:
<head>
One answer is via the define:vars template directive.
一个答案是通过 define:vars template指令。
define:vars will pass our variables from the frontmatter into the client <script> or <style>. It’s important to note that only JSON serialisable values work here.
define:vars 将我们的变量从frontmatter传递到客户端 <script> 或 <style> 。需要注意的是,只有JSON可序列化值在这里起作用。
Let’s give this a shot.
我们给予看吧。
We must reference the gradientFrom and gradientTo variables passed as props in our <style>.
我们必须引用 gradientFrom 和 gradientTo 变量作为props传递给我们的 <style> 。
First, to make the variables available within <style>, we’ll go ahead and use define:vars as follows:
首先,为了使变量在 <style> 中可用,我们将继续使用 define:vars ,如下所示:
// 📂 src/components/Card.astro --- const { title, to, gradientFrom, gradientTo } = Astro.props; // … ---


